Recent Posts

AIFF VS FLAC compared: Which is better?

FLAC vs AIFF

Both FLAC (Free Lossless Audio Codec) and AIFF (Audio Interchange File Format) are lossless audio formats that can be used to store and distribute audio files.

However, if you are an audio nut or audiophile, you may be wondering, which format is the most suited for my music needs? So, here is a comprehensive comparison guide to help you choose between AIFF and FLAC.

What is FLAC?

FLAC is an acronym standing for “Free Lossless Audio Codec” first developed in 2001 by Xiph.Org Foundation. It is an open-source audio compression format that compresses the original files bit by bit using Pulse Code Modulation or PCM with no quality loss hence the name ‘lossless.’ The original audio files are compressed to about 60% of their original size.

FLAC compression works similarly to ZIP compression but is only used for compressing music files bit by bit. No data is lost during the compression process.

It can also be used to store tagging information, cover art, and fast-seeking information.

Being an open-source codec means that it is freely available for public use without infringing on the patent. However, you can copy-protect your FLAC audio files using another container format.

Features offered by FLAC

  • It is lossless and open source and does not offer DRM copy-protection but you can encrypt your audio files using another container if you like.
  • FLAC is a seekable audio format meaning that it does not buffer when seeking a certain timestamp. This is essential for accurate seeking, especially when editing your files.
  • You can stream FLAC files from your home media server or other streaming services offering FLAC.
  • FLAC can be used to rip some of your music files from sources such as CDs using software such as Windows Media Player with no loss in data for storage. You can also convert other audio formats such as AIFF to FLAC to use less storage.
  • It is also error-resistant meaning in case an error occurs during compression, the rest of the file is not destroyed. Only the corrupt frame gets destroyed essentially limiting damage to your music files.  

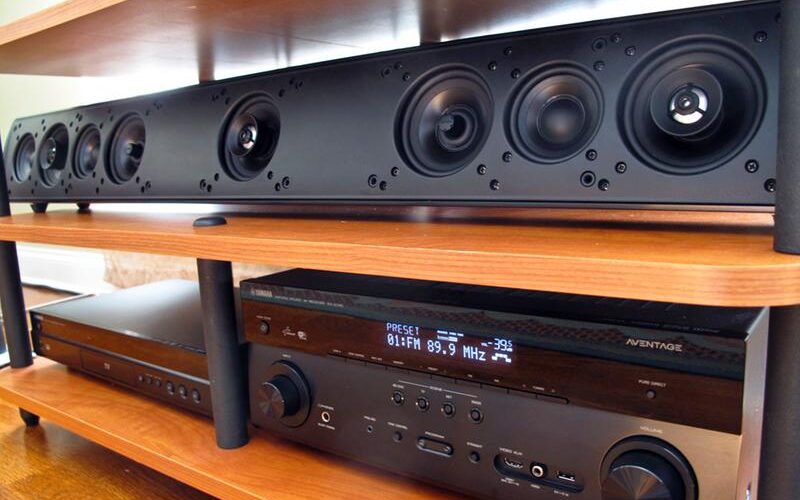
How to play FLAC files

You can play FLAC music files in your stereo system, your car, through your headphone, or any other music system just like you would with other popular music formats. However, you will need a player capable of opening the files.

The most popular way to play FLAC files on smartphones, PCs, and Macs is using VLC which is free software that you can readily download from reputable internet sources.

Other players such as Windows Music Player and iTunes may require you to install a plugin to decode the audio files.

However, most media players will be compatible with FLAC. These media players include JetAudio app for android phones, Clementine for Mac OS, Media Connect for iPhones, Roon, and others.

What is AIFF?

AIFF is an acronym that stands for Audio Interchange File Format is a lossless audio format that was developed by Apple in 1988 based on the.IFF format (Interchange File Format). This format is, therefore, mostly used on Apple products.

However, unlike FLAC, AIFF files are uncompressed and use more storage (about 70% more storage).

You will require more space to store AIFF files which are 10 Megabytes for every minute of the music file. This means that for a minute file, you will require about 100 MBS of storage.

AIFF files are sampled at a rate of 44.1 kHz which is 44100 cycles per second and with a bit depth of 16 bits using Pulse Code Modulation (PCM) similar to WAV (Waveform Audio Format) files that are stored on CDs. That is why AIFF is also known as the Apple version of WAV.

However, there is a compressed AIFF version known as AIFC or AIFF-C that was also developed by Apple. This compressed version compresses the audio files by 6 times their original size.

AIFF audio format;

  • Is a lossless and uncompressed format that requires more storage. This format retains all the bits of audio information found on the original file.
  • Supports loss point data.
  • AIFF supports metadata information such as the name of the Album, file name, and so on.
  • Audio files encoded using AIFF are composed of several chunks with Sound Data Chunk and common Chunk being mandatory while other chunks such as Name Chunk, Instrument Chunk, Marker Chunk, and so on are optional.
  • You can rip your CD files to AIFF using compatible software.

How to open AIFF files

Several players can open and play .AIFF audio files. These media players include Apple iTunes, Apple QuickTime Player, VLC for computers and smartphones, Windows Media Player, PowerAMP Music Player for Android phones, and others.

Converting AIFF and FLAC audio files

With the right software converter, you can convert AIFF audio files to FLAC files to use less storage and vice versa.

One such software is MAX which can be used to not only convert these files but can also rip your audio files. Other conversion software that you can use is iDealshare VideoGo, Faasoft, Footbar 2000, dBpoweramp, JRMC, HD Video Converter, and many more.

You also have the option of using online converters. However, some converters are slower than others.

FLAC vs AIFF: Comparison Table

FLACAIFF
Is a lossless formatIs a lossless format
Involves compression of the original files by about 40%Does not compress the audio files
Offers high-quality audioOffers high-quality audio
Can be used on Macs, iOS, Android, and WindowsCan be used for Macs, iOS, Android, and Windows but is best suited for Apple products.
Can be used to archive your physical audio CDs.Can be used to archive your physical audio CDs.
Uses about 40% less storage than the original files.Does not compress the audio files and hence uses more storage. 10 MBs per minute to be precise.
FLAC files can be downloaded much faster.Downloads take much longer due to the larger file sizes.

Which is better?

Both FLAC and AIFF and great and lossless audio formats that can be used to store and play music in your sound system.

The biggest difference between these formats is that one is compressed and the other is uncompressed hence requiring about 50% less storage.

With both FLAC and AIFF no bits are lost as all information is copied bit by bit. You can also convert one format to the other and the audio file will remain the same. However, if you are more concerned about storage, you should convert your files to FLAC.

You are also better off with FLAC since most media players outside the Apple ecosystem can natively support it. But if you are an avid Apple user, AIFF will be natively supported by your player.

It all comes down to personal preference, the device you use, your favorite media player, and most importantly storage limits.

How to mount a projector vertically (Solved)

How to Vertically mount a projector

There are many reasons why one would want to mount a projector vertically and there are also certain projectors that are meant to be used similarly.

However, if you already have a projector and want to do any of the following things, you may need to place/mount the projector vertically on its side. The common reasons for doing this include;

  • For portrait orientation during a presentation
  • Ceiling projection
  • Limited space to mount the projector

This would be different from the more traditional horizontal projection we are used to and may have some drawbacks depending on the projector model and other factors.

However, before we look at how you can place your projector vertically without damaging it, we should look at why this may not be a good idea.

The problems with placing a projector vertically

1.      Heat build-up

One of the major drawbacks of vertically placing a projector is inadequate heat dissipation which is likely to happen when the projector is placed on a surface.

This happens because the air intakes usually located at the rear of the projector may be partially blocked hence the projector will not have adequate air circulation for cooling.

Heat builds up within the projector and may gradually damage its lamp reducing its lifespan. A projector’s lamp can be expensive to replace.

2.      Pressure exertion on the internal components

This happens when you place a projector on its side on a flat surface but should not be a big deal for most projectors since the internal components are usually well secured.

Most manufacturers advise against placing or mounting a projector on its side. However, with a well-built projector, this should not be much of a problem.

How to mount a projector vertically

To use portrait mode on your projector with no vertical image orientation, you should get an adjustable ceiling mount.

The adjustable mount should have a swivel for use in both the vertical and horizontal positions.

How to project an image on a ceiling

To project an image on your ceiling, you can use a Pico projector capable of vertical projection. It can be mounted on a stand and pointed to the ceiling without affecting air circulation.

However, this may not be an option if you already own a projector.

In this case, you can use a first surface or front surface mirror front surface to reflect your projector image.

For the mirror option, you could do either of the following;

  • Install a ceiling mirror reflection system for the option of both front and ceiling projection. One such system is the Audiopack mirror kit system. However, this is a costlier option that will also require that the projector has adequate air circulation.
  • The second option would be horizontally placing your projector on a flat surface such as a table and using a first surface mirror angled at 45° to the ceiling with the projector’s lens facing the mirror. This means that the mirror will be at an angle of 135° from the projector’s lens. You could build a simple system using these angles to hold the mirror in place.

When using a mirror for projector ceiling projection, adjust the image appropriately (keystone correction).

Final thoughts

When vertically mounting your projector or placing it on its side, ensure it had the proper heat dissipation required to keep the projector in good condition for longer, especially the lamp.

Fortunately, there are safer ways to do this that will not be detrimental to your projector’s health like the DIY solutions above.

With these tricks, you can view content from the ceiling or use your projector in portrait mode.

Screen tearing explained (Causes & fixes)

Screen Tearing (2)

Screen tearing is a glitchy artifact that occurs when a display’s refresh rate (monitor, TV, projector) is out of sync with the video feed’s frame rate. Thus horizontal or diagonal splits/tears appear on the display.

If you are into high frame rate games, this is something you may have experienced.

This is because the GPU forms more frames than the display can redraw (refresh). As the monitor tries to display 2 or more frames at the same time, tearing occurs.

Fortunately, there are sync technologies such as G-SYNC, Adaptive sync, HDMI VRR, VSync and so on that can fix this issue depending on how the display and GPU are specced.

All in all, Screen tearing can degrade your visual experience, so, let’s get more technical with the causes and the fixes.

Causes of screen tearing

Screen tearing is caused by buffer switch synchronization issues between the video processor (GPU/graphics card) and how fast the display can refresh each frame. A buffer is a physical memory in a video card where data is stored before being moved to the display’s processor.

However, this is more likely to happens when the FPS is higher than the refresh rate (i.e, running 120 fps at 60Hz).

As the display circuitry tries to output the already rendered frames at a frequency higher than its refresh rate, one or more frames start displaying on an already displayed frame causing phase issues and tearing. What you end up with 2-half frames or more being displayed concurrently.

Consequently, you may experience stuttering if your GPU can’t keep up with the display’s refresh rate (i.e running 60 fps at 144 Hz). In this example, the stutter will be more noticeable since 144 is not a multiple of 60 (the monitor’s panel refreshes 2.4 for each frame) causing timing issues.

When the refresh rate is significantly larger than the frame rate, gaming will feel laggy and slow as some frames may be skipped.

With high refresh rate monitors (120 Hz+), screen tearing is unlikely as they are made of high-quality panels, have better processors, and are able to sync better with the GPU’s frame rate. In addition, most games are played at lower frame cycles.

A defective cable can also cause issues with stutter, tearing, and other video artifacts but this should be fairly easy to troubleshoot since it also affects the audio signals.

How to stop screen tearing

Vertical synchronization/Vsync and multiple buffering technologies have been implemented to mitigate screen tearing and stutter.

In multiple buffering (double/triple frame buffers), 1 or 2 frames (back buffer) are prepared by the video card but are not drawn until the already displayed frame/front buffer (on the monitor) is swapped. This ensures that only one frame can be drawn at a go.

Video cards and the multi buffering programs can run independently of each other reducing strain on the cards which prevents tearing and minimizes lag during gaming.

Triple buffers are used on;

  • Fast Sync by Nvidia
  • Enhanced Sync by AMD

In these two examples, 2 back frame buffers are used ensuring that a frame is always stored on the second back buffer ready to be drawn on the display as it refreshes. If the display does not refresh fast enough, the stored frame is overwritten by the successive frames from the other back buffers and the cycle continues.

What you end up with is a smoother gaming experience.

On the other hand, vertical synchronization or Vsync ensures that the frame rate and refresh rate are properly timed. This is done by limiting the frame rate on the GPU to the refresh rate. The GPU has to wait until the display refreshes before outputting the next frame.

As you will see below, V-sync is not the perfect solution as it significantly increases input lag. This is where G-sync and FreeSync come in.

V-sync vs G-sync vs FreeSync

V-Sync:

Vsync is the most common solution to screen tearing. This is because it is free, does not need a special display, and is supported on most graphics cards by default but only uses 2 memory buffers (double buffering).

By enabling V-sync, it synchronizes the FPS on your GPU to the refresh rate on your gaming display. The frame rate is capped so no frame is drawn on an already existing one.

However, it only limits the FPS to a fixed number i.e 30, 60, or 120. For example, when gaming at 119 FPS on a 120 Hz display, the frame rate will be capped at 60 FPS introducing extra input lag and stutter.

For fast-paced games, this level of input lag can be worse than the tearing itself, depending on who you ask.

But there is an improved version of V-sync by Nvidia known as Adaptative V-Sync.

Adaptive V-Sync only limits the frame rate if it is higher than the refresh rate. Vsync is only enabled at high frame rates to eliminate tearing and disabled at lower frame rates to eliminate stuttering.

Vsync ONVsync OFF
TearingNo TearingTearing
Input LagHighLow
Latency (Average)~90 ms~25 ms
!Latency may vary hugely depending on your monitor

However, to prevent the introduction of extra input lag, you will need G-sync or FreeSync.

G-Sync and FreeSync:

G-Sync is a variable refresh rate technology that is different from V-Sync.

Unlike Vysnc, Gysnc eliminates tearing without introducing input lag but will only work on supported devices such as GeForce GTX series cards, some monitors, and some TVs such as the LG c9 OLED TV.

G-Sync dynamically changes the display’s refresh rate to match frame rate output as long as it is within the variable refresh rate. For example, when gaming at 75 FPS on a monitor with a variable refresh rate of 60 to 144 HZ, the monitor’s refresh rate is changed to 75 Hz.

AMD’s Freesync is similar to G-Sync that is supported by most AMD graphics cards (Radeon RX 200 series) and APUs (Accelerated Processing Unit), compatible monitors, some TVs, Xbox ones, and so on.

FreeSync has the added advantage of being an open-source technology which makes its implementation much cheaper. And unlike GSync that works best over a Displayport connection, FreeSync can work over HDMI, USB-C, and DisplayPort 1.4 or later.

There is also a number of FreeSync monitors that can run Gsync but in terms of visual performance, there is not much of a difference.

But since we are talking about adaptive sync technologies, it is also worth mentioning HDMI 2.1 Forum VRR.

HDMI Variable Refresh Rate (VRR)

HDMI Forum VRR is a Variable Refresh Rate feature supported by HDMI 2.1 devices.

This feature reduces screen tearing and stutter by delivering Frames as fast as possible from the source to match the display’s refresh rate for more fluid motion.

If your GPU, TV, or monitor has HDMI 2.1, check the user manual to confirm if it supports VRR over HDMI and how you can turn it on.

Enhanced Sync vs Fast Sync

Fast Sync and Enhanced Sync are essentially the same as they combine triple buffering (3 GPU memory buffers) and vertical synchronization technologies to eliminate screen tearing by subsampling the Frame rate to match with what your display is capable of.

Fast Sync is available on Nvidia cards that include;

  • Geforce 900 series (Maxwell)
  • Geforce 20 series (Turing)
  • Geforce 10 series (Pascal)

To use Fast Sync, turn Off Vsync for the best experience.

However, you can use Fast Sync with Gsync On or Off. If the frame rate (render rate), falls below the monitor’s refresh rate, the refresh rate is changed dynamically by Gsync. On the flip side, if the FPS is too high (1.5x, 2x, 3x… the refresh rate), Fast Sync kicks in and only sends a frame from the front buffer to the monitor/TV when it refreshes.

This is because there are 2 back buffers and a front buffer as we mentioned earlier when explaining triple buffering.

Enhanced Sync is AMD Radeon card’s answer to Nvidia’s Fast Sync as they both essentially do the same thing, use two back frame buffers to stop tearing at high FPS.

If you already have a frame displayed, the next completely rendered frame is taken to replace the existing frame and the other frames are discarded and the cycle continues. Only one frame is drawn on your display at a time hence, no tearing will occur.

No limit is placed on the number of frames that can be displayed per second, what the monitor can handle per second is displayed.

Fast-Sync and Enhanced Sync introduce a bit of input lag and slight stutters but not as much as V-Sync does. Therefore, your gaming input response time may not be as good as it would without them turned on but you will not experience tear artifacts.

What to use to reduce screen tearing

If you have compatible a compatible and are not too concerned with a bit of input lag at high Frame rates, use Fast-Sync or Enhanced Sync. Both will work on any display.

The other option would be the use of G-Sync or Free-Sync on supported devices as they minimize screen tears without introducing much latency. But G-Sync compatible devices are significantly expensive compared to Free-Sync devices of the same quality. You are required to have a compatible GPU and display for any of them to work.

VSync will be available on most GPUs and you can turn it On if you don’t mind the input lag.

Screen tearing myths?

  • Lowering resolution will reduce screen tearing. This is further from the truth as screen tearing has nothing to do with screen resolution. Screen tearing is caused by synchronization issues between frame rates and refresh rates.
  • HDMI cables can cause tearing. HDMI cables are high bitrate/High-speed cables and cannot cause screen tearing unless defective. Bandwidth between different HDMI versions will vary and this can only affect the number of frames being pushed from your computer to the monitor. You should be okay with up to 60 FPS for most HDMI cables but for higher FPS at 1440p or higher, you will need an HDMI 2.0 cable or later.

Surround sound headphones in 2022 (5.1, 7.1 & Atmos)

Surround Sound Headphones Explained

As a big audio enthusiast, you are probably aware of surround and 3d sound formats such as 5.1 and Dolby atmos respectively.

These formats were developed to create an immersive cinema experience but slowly found themselves in consumer products such as home theater systems and even headphones.

Numbers such as 5.1 or 7.1 are used to represent the number of audio channels. 5.1 surround comprises of 5 dedicated channels and 1 LFE channel for the bass effects and so on. Learn more about these surround sound channels by visiting this article.

Surround sound headphones are a more compact and cheaper alternative to the costly surround sound speakers that are also be complicated to set up and calibrate. These headphones can be used for watching movies, gaming, and listening to music.

To achieve this immersive experience, headphones mainly use virtualization technologies such as Atmos for headphones or Apple’s spatial audio while others use multiple drivers for the respective channels.

But to better understand surround sound headphones, we should take a deeper dive into the related concepts.

Virtual surround sound headphones

You can get surround sound on any pair of stereo headphones (have 2 drivers) provided you can use one of the several virtual surround sound technologies available today.

Virtual surround sound headphones can mimic a surround sound setup by using concepts of psychoacoustics (how people perceive sound) and Head-Related Transfer Function or HRTF techniques to create a spatial sound experience.

HRTF techniques take advantage of how sound waves hit our ears and how these sound waves interact with the environment and parts of our body from the shoulders to the curves in our ears to give a sense of direction and space.

On a basic level, these techniques use level, time, and other subtle sound differences to give you an idea of where the sound comes from.

From this, sound processing algorithms are created by adding delay, volume adjustments (Levels), and other aural cues to mimic a proper surround sound system.

The reason virtual surround sound works so well on headphones is that they operate in a more controlled environment with little interference such as crosstalk. You are also not limited by your room’s layout or sitting position.

Some headphones also feature gyroscopes, accelerometers, and magnetometers to track head movement for fully immersive 3d sound. Known as head-tracking headphones, these headphones are able to adapt the sound depending on your head’s orientation.

Some popular examples of head-tracking headphones you can buy today include;

  • Apple’s Airpods Max
  • Pulse 3d headphones by Sony
  • Yamaha YH-L700A 
  • HyperX Cloud Orbit S
  • Audeze Mobius headset

Headphone virtual surround sound examples

1.       Dolby Atmos surround for headphones

Dolby Atmos is a 3D object-based sound format that can be used with any pair of stereo headphones positioning objects in a 360° space.

More content is now available in Dolby atmos whether you are a gamer, a movie buff, or a music lover. Thus, this is the best way to experience virtual 3d-audio as long as your source supports Dolby Atmos whether it’s a tv, a Dolby Atmos receiver, an Xbox, or your windows PC by using the Dolby access app.

2. Apple’s spatial Audio

Spatial Audio is Apple’s answer to Dolby Atmos for headphones for delivering surround sound and 3d audio including Dolby Atmos on AirPods (Pro & Max).

Combined with the head-tracking technologies in the new Airpods pro and Airpods Max, you will enjoy a fully immersive experience from the comfort of where you are.

However, spatial audio is only supported on paired Apple devices for movies and music.

3.       DTS Headphone:X

DTS Headphone:X is another object-based format and a Dolby Atmos for headphones alternative.

This codec can be used with stereo headphones but only with DTS-X content to simulate a 3d audio environment.

To get DTS-X for headphones, you will need to purchase the software which costs $20, or buy a DTS headset that will come bundled with the software.

If interested in learning the differences between DTS-X and Dolby Atmos, visit the linked article.

4.       Auro 3D for headphones

Auro 3D is equivalent to Dolby Atmos and DTS-X and also comes with a virtual solution for headphones.

It also works best with Auro 3D content to create the illusion of sound coming all around you even from above but will also work with content that has not been encoded in Auro 3D for a 5.1 or 7.1 surround effect without the extra height element.

5.       Windows Sonic for headphones

This is a free solution for use on Windows computers for gaming and watching movies.

Windows sonic will be supported by some games and for content encoded in surround sound formats.

To use Windows Sonic for headphones, right-click on the sound icon on your Windows Taskbar. Select the Spatial Sound option to see the Windows Sonic for Headphones option. Click on that option to turn on Windows Sonic and repeat the same process to turn it off.

6.       Super X-FI Headphone Holography

This is a virtual surround sound option brought to you by Creative Labs.

Super X-Fi uses your face and ear profiles to personalize your surround sound experience when you are using your headphones. The photos are taken using an app on your smartphone or tablet.

It can be used as a software solution for stereo headsets but can also come with Creative Lab’s virtual headphones with an onboard DSP (digital signal processor) that processes your audio for an immersive surround sound experience.

7.       360° Reality Audio

This standard is similar to Super X-FI in that it personalizes your experience using your head and ear profiles but only works with Sony headphones.

It is mainly aimed at music listeners but you will need a top-tier subscription on the supported streaming platforms such as Deezer which might be expensive for some.

8.       THX Spatial Audio

THX is another software option that creates a virtual surround sound effect on stereo headphones. It also comes with several presets to enhance your experience further depending on what you are watching or the game you are playing.

These are just some of the popular virtual surround sound options but others include;

  • Razer 7.1 Surround Sound
  • Boom 3D by Global Delight
  • Ultrasone S-Logic Headphone surrounds by Ultrasone.
  • Dirac VR
  • Yamaha Silent Cinema

True 5.1 or 7.1 surround sound headphones

True surround sound headphones use multiple small drivers that are strategically placed and angled to create a surround sound effect.

5.1 surround headphones have a total of 8 drivers, 4 drivers in each headphone cup. These drivers include a center channel driver, a from channel driver, a side surround driver, and a bass driver for each ear.

7.1 surround headphones boast a total of 10 drivers, 5 drivers for each ear. The drivers include all drivers found in a 5.1 headphone cup but with an extra rear surround channel for each ear.

There have to be two center-channel drivers since you cannot have a single center channel driver. The two center-channel drivers are combined to create a full center channel experience that is essential for dialogue and most speech in a movie or a game.

Most True surround headphones also come with a plug-and-play adapter where the decoding and equalization are done for a better and more immersive experience overall.

The downside to these headphones is that they tend to be bulky and expensive.

7.1 headphones
7.1 surround sound headphones

The Low-Frequency Effect or LFE channel (the .1 channel)

This is something that most people tend to gloss over when talking about surround sound headphones.

The LFE channel is a channel responsible for the bass effects but does not represent the number of bass drivers in a surround headphone.

So, how do surround headphones reproduce the low frequencies yet they do not have subwoofers required to move a lot of air which is crucial for adding depth to audio?

The answer lies in how close the headphones are to our ears, the headphone’s design, and our bone structure.

Since headphones are usually so close to our eardrums and ear bone structure, they do not need to move much air or rumble as much to reproduce bass for depth.

These effects also hit our head bone and ear bone structures to vibrate them. The vibrations are then received by our brains which process the information to produce the same effect that a subwoofer would have on us.

How the surround headphones are designed also affects how we perceive the low-frequency effects. Most surround sound headphones have a sealed design with minimal leakage which when coupled with the proximity of the headphones to the ears create great bass and an immersive surround sound experience.

Surround sound headphones will not sound great if they do not have a great bass response. Depth is essential both in a surround sound system and a stereo system.

What to look for in surround sound headphones

  • The most important thing to look for when buying surround headphones is audio quality. Sound quality is very subjective and if you can get a chance to listen to the headphones before buying, that would be ideal.
  • Comfort is also essential, especially if you are a gamer or if you plan on binge-watching certain shows and movies using the headphones. This may vary depending on personal preference but you want a set that is light and has great cushions ideal for long use cases.
  • Active Noise-canceling (ANC) or noise isolating headphones will come in handy in noisy listening environments.
  • Long battery life is important on wireless surround headphones since most of the models need to be charged for use. At least 10 hours of battery life should be great since you may not be using your headset for longer than that due to fatigue.
  • Headphones will collapsible ear cups are great since they are easier to store and tend to be more comfortable.
  • A Built-in microphone and control module will be great, especially if you love playing interactive PC and console games.
  • Durability is also important but depends on how much you are willing to spend. Headphones will metallic and carbon fiber build will last longer but tend to be costlier.

Are surround sound headphones worth it?

Surround sound in headphones can help improve your listening experience if you cannot afford to build a dedicated speaker surround system, if you do not have enough space, or if using your system would be a nuisance to others.

But many would argue that virtual surround headphones are better and will outperform true surround sound headphones which are also costlier. This is a sentiment I agree with since codecs such as Dolby atmos have improved over recent years.

Being immersed in a game or a movie will improve your experience and will also determine if you perceive something as great.

Blown Subwoofer: Causes, diagnosis & Fixes

Blown Subwoofer Causes, diagnosis & possible fixes

Subwoofers are great for adding “Oomph” to a sound system but are also known to blow when overpowered. Though rare, it happens.

So, what is a blown sub?

A blown subwoofer is one that has undergone a mechanical or thermal failure. This is excluding accidental physical damage such as dropping the subwoofer or poking the sub’s cone using a sharp object.

But how can you tell if your sub is blown and can it be fixed? Well, let’s explore.

Causes of a blown sub-woofer

1.      Over-powering the subwoofer

Overpowering is the most common cause for blown subs.

Subwoofers have power ratings and that can be the peak power, continuous power handling, or RMS.

The peak power can only be sustained for short bursts and is not as reliable as RMS and continuous power handling which can be sustained for longer.

Usually, your sub driver should only draw just enough power to play the sub-bass frequencies. This should be below the RMS rating. Exceeding the recommended power levels could easily render it unusable.

This is because most sub-woofers have an efficiency of around 1% meaning that only 1% of the power drawn is converted to audible sound while the rest is converted to heat. What’s more, the efficiency of the sub driver drops as heat builds up (learn more about speaker wattage, efficiency, and heat by clicking the link).

So, if you drive your subwoofer at 80 watts, only 0.8 watts are used to move the driver while 79.2 watts are converted into heat. This heat is then dissipated through convection as the driver moves air and through radiation.

When too much power is sent to the driver, more heat is generated than the sub is equipped to dissipate. Thus, the heat builds up in the voice coil.

Overheating the voice coil will, in turn, soften the glue/adhesive holding the coil to the former, deforming it and as more heat builds up, complete damage occurs.

A deformed voice coil will not work as it was intended and may scrap on the sides of the voice coil gap. You may hear rattling, scratching, buzzing, or other unpleasant noises as the driver moves back and forth.

Additionally, a damaged coil will stop working altogether and you will have no sound playback.

Parts of a subwoofer. Blown Subwoofer.

2.      Overpowered clipped signals

It’s not the clipped/distorted signals from an amp that can damage a subwoofer but the excessive power from these clipped signals.

This is something that most people often get wrong.

Most sound systems will experience some form of distortion which can come from the source or the amplifier. If clipped signals were to cause speaker or subwoofer damage, most sound systems would not survive.

The problem with clipped signals is the significant increase in the amount of power they deliver to the subwoofer’s drivers.

Distorted signals may not have as much punch as most people prefer and to compensate, they increase the level. In turn, more power is delivered to the sub with no improvement in sound quality.

And as we have seen in the first point, more power is equal to more heat, increasing the likelihood of damage.

Clipped signals do not cause mechanical or thermal damage but overpowering the drivers beyond their power handling capacities does.

3.      Mechanical failures

Over excursion of the sub’s cone can cause failure but this is less common.

Most speaker drivers are made to withstand over-excursion from their rest area without sustaining significant damage (Xdamage).

But in some cases, the cones surround (cone’s frame) and the spider (a flexible ring that supports the cone) may be stretched limit. When this happens, the suspension may tear, or in worse case scenarios, the voice coil may be pulled out of the voice coil gap (less common).

If the voice coil moves out of place, it overheats from the incoming power as it no longer rests in the magnetic field and does not move as intended. Therefore, the power is converted into heat instead of moving the cone.

However, if only the cone structure, especially the foam, tears or comes loose, fixing the sub should be possible using flexible silicon rubber gel.

Mechanical failure of the magnet assembly can occur if the glue and bolts that hold the front and back plates come loose. The voice coil can get jammed in the voice coil gap which is made to precisely fit the coil.

Failure can also occur if an object gets into the voice coil gap. These can be soil particles, a small piece of metal, a breakaway particle from the magnet, or any other foreign object.

These objects can short the voice coil, melt, and stick on the coil or cause abrasion to the surface insulation of the winding wire. This will cause significant damage to the sub driver.

4.      Wire failures

There is a flexible wire that connects the positive and negative leads on the sub to the respective terminals on the voice coil.

These wires can fail/break and stop the flow of current to the coil.

If this is the reason your subwoofer is blown, soldering another feed wire to the respective terminals should easily solve the problem but it’s not always a possible undertaking.

How to tell if your subwoofer is blown

It may not always be obvious if your subwoofer is blown unless it is mutilated. However, there are several ways to diagnose this and tell which part is damaged.

1.      Listen for distorted bass, scratching, buzzing, and other noises

Playing a soundtrack on your source with your subwoofer connected to the system is one way you can diagnose a blown subwoofer.

If the bass is weak and distorts with an increase in volume, you may have a blown sub in your hands. The same case applies to hearing buzzing or scratching noises that can be a sign of voice coil damage.

2.      Physically inspect the cone and voice coil

This will involve checking if the suspension or cone is torn. The attachment between the surround and the cone can also come loose.

You can also use your hands to gently press on the sub’s cone. The cone should move back with ease and get back into its resting position once you let go.

If the cone wobbles/dances around, the spider may be loose. Lack of movement may indicate a jammed voice coil. The voice coil may be stuck in the magnetic gap or may have moved out of place.

If you hear scratching noise on pressing the cone, then the sub’s voice coil is distorted due to thermal damage.

You can also visually inspect the voice coil by opening up your subwoofer and carefully taking the driver out of its enclosure. The coil may be discolored partially or entirely, it may look burned and the coiled wire may be hanging loose. All these are telling signs of a blown coil.

3.      Use a multimeter to test driver circuit resitance

To do this you will need to disconnect the subwoofer from the power outlet and audio source if it’s active and from the audio source if it’s passive.

Connect the positive probe on the sub’s positive terminal and negative to the negative terminal and check the reading on your ohmmeter (multimeter). Ensure the meter is well calibrated and set on a lower range for this test (0-100Ω/X1 range) to prevent inaccuracies.

If you get a 1-ohm reading, the voice coil is still functional. A reading of 0 ohms is bad news as it shows that there is a short and the coil is completely blown (electrical failure).

You can also take a step further to ensure that it is not the flexible wire connecting the terminals on the coil to the leads that are the root of the problem.

For this, the multimeter probes should touch the respective terminals on the voice coil itself. If you get a reading or 1 ohm but had a 0-ohm reading before, then the flexible wire is the problem. It may need to be replaced if possible.

Can you fix a blown subwoofer?

This will depend on the extent of damage and the damaged component.

If the damage is only mechanical such as a tear on the cone or the surround, you can fix it before it gets worse using flexible glue.

A damaged voice coil or failed spider will mean a full reconning process. You will need to buy a whole cone kit, including the coil, cone, surround, flexible lead wires, the gasket, the dust cap, and adhesives. Reconning kit can sometimes cost as much as the subwoofer itself.

It also goes without saying that the processing of installing a new cone is delicate and should be done by an expert who charges for the service, not including other costs such as shipping. This is because foreign objects may get into the magnetic gap in the process if you are not careful enough.

It is also easy to damage the cone kit while installing it.

If the damage has only occurred on the magnet assembly to a small extent and it is still intact, repair may be possible. This will involve taking the magnetic components apart, demagnetization and re-magnetization. It’s a complex process that a few repair experts will attempt.

The thing with blown subwoofers is that you are better off replacing the whole thing with one that is more power-efficient, has a better quality build, and is better at dissipating heat.

When replacing a blown sub, choose one with better power handling, cabinet construction, a more linear driver, and one that is best suited for your listening or theater room. The sub should also have a limiter to reduce the risk of the voice coil heating up and distortion.

Meanwhile, use your volume knob reasonably and don’t overdrive sub. This will apply to both passive and active subs. Do not exceed your sub’s power handling limit.

Blowing a subwoofer is not easy but is not impossible and, therefore, it’s essential to take great care of it.

Passive vs Active soundbar: Which is better?

Passive VS Active soundbars

Soundbars are a great way to improve sound quality in a home entertainment setup considering how slim TVs have become, especially OLED TVs. With a soundbar, you can take your setup to the next level by greatly improving your listening experience whenever you are watching a movie or listening to your favorite track.

But when most people are talking about soundbars, two main options pop up;

  • Active soundbars
  • Passive soundbars

Both of these soundbars are great additions for improving the sonic experience in a media room or a home theater but there are key differences between them.

Active soundbars are all-in-one sound systems with built-in amplifiers, source inputs, digital signal processors (onboard DSP), and speaker drivers. Meanwhile, Passive soundbars have no internal amplification, source inputs, or sound processors but usually, have larger speaker drivers. You need a receiver, an integrated amp, or a preamp and power amp to use a passive soundbar.

From this alone it may seem like an active soundbar is the clear winner but that may not necessarily be the case. Both options have a host of advantages and disadvantages over the other and depending on your needs and budget, you may find a passive soundbar to be way better for you.

So, before you decide, let us look at each option in more detail.

What is an active soundbar?

Most soundbars on the market today are active soundbars and the simple reason for this is convenience.

As we have seen, active soundbars have sound processors, amplification, crossovers, speaker wiring, and other components such as Bluetooth receivers and RF transmitters all integrated into one system. All these components are designed and tailored to work together.

This makes for a lightweight and is easy to install sound setup convenient for most homes and small home theater builds.

An active soundbar is what you should invest in if you do not want to go through the hassle of wiring your system which I go through in more detail here. You will only need to connect your source to the soundbar, plug it into a power outlet and place it in a great position and you are great to go.

Some active soundbars may also come with built-in software for calibration and room correction that can be done using an app on your phone and a calibration mic that comes as a bundle.

The number of channels can also vary ranging from 3.1 to 5.1 for a full surround sound experience.

Surround sound can be achieved virtually with built-in speaker drivers that are angled in different directions to give the illusion of sound coming from all directions around you or through the addition of satellite speakers to complete the surround setup. This is not forgetting that some also have up-firing speakers for 3D surround sound formats such as DTS-X and Dolby Atmos.

All this is done without needing a receiver, a preamp + power amp, or an integrated amplifier. You also don’t have to worry about component matching, especially the amp’s impedance since everything is optimized to work together with great precision.

Active soundbar
The Vizio Elevate is a great example of a high-end Active Soundbar

Active soundbar signal path:

There are two main ways an active soundbar can be connected to a source and this can be through an HDMI connection or using an optical cable.

Once the soundbar is connected to the source, the audio signals are sent to the onboard processor where they are decoded and then sent to the crossover on the soundbar. The crossover filters the different signals and the high frequencies are sent to the tweeters, and mids and lows are sent to the woofers (some of the lower frequency signals may be sent to a sub if you have one).

But before the tweeters and woofers can reproduce the audio, the signals need to be amplified and this is where the built-in power amp comes in to amplify the electric signals and power the soundbar drivers for each frequency band.

The pros and cons of an active soundbar

Pros:

1.       Fast and easy installation

Installing an active soundbar is quite easy as all you need to do is connect it to an audio source and a power source.

This can be done by anyone even for a first-time setup making it very convenient. You do need any professional help or technical experience to connect the cables and power cord.

Calibration is also easy on active soundbars with automatic EQ software that do room correction for you with ease without needing any more manual input from you.

2.       No component matching is required

Because the internal components and speakers are designed to work together, you should not worry about matching the external components.

The drivers have all the power they need which means their performance is optimized. You do not have to worry about overdriving and blowing the speakers.

Performance is optimized further as the audio signals pass through an active crossover before being sent to the individual power amps for each driver. Each driver, therefore, gets more power because they are driven separately reducing phase shift distortion since the amplified signals hit the drivers at the same time.

3.       Easy Wireless applications

Some active soundbars have transmitters and receivers that allow for easy wireless connection. These receivers and transmitters can use Bluetooth, Wi-Fi, or other radio wave technologies for wireless connections whether it is using your phone as the source using Bluetooth or Wi-Fi to send signals to speakers in other rooms (multi-room setup) or surrounds.

However, this does not mean that you will go fully wireless since the soundbar has to be connected to a power source.

4.       Less interference

Home entertainment systems are prone to electromagnetic interference which causes hum and buzz in speakers.

Cables are a cause of interference in most setups. But because active soundbars have less wiring as the drivers and amps are close to each other, interference is less common.

The interference can be reduced further if the soundbar has an advanced DSP that allows for auto-calibration and compensation of any signal quality reduction that may be caused by any interference.

Cons:

1.       The setup is permanent

Unless you buy a new system, you are stuck with what you purchase. You cannot tweak or make any changes to the amplification or the sound processor.

There is also less flexibility since you are stuck with the number of inputs on the soundbar. Most active soundbars have a limited number of inputs with most of them having 2 HDMI ports at most and one optical port.

2.       Active soundbars are heavier

Since all components have to be crammed in the soundbar’s cabinet, the active soundbar will be heavier when compared to a passive soundbar.

What is a passive soundbar?

A passive soundbar is different from an active soundbar in that it does not have any internal amplification or DSP. You will need an external receiver, integrated amp, or a separate preamp/power amp combination just as you would do with a traditional speaker setup.

This soundbar is usually made up of speaker inputs, a passive crossover, and about 7 speaker drivers (which can vary depending on the model). These drivers include 4 woofers, 2 for the center channel, and one each for the left and right channels. There are also 3 tweeters for the center, left, and right channels for a total of 3 channels.

However, these speaker drivers are usually larger (some active soundbars have large drivers too), draw more power, and, therefore, push more air for higher sound pressure (are louder). This is why they use external amplification.

But it is worth noting that the sound quality will only be as good as all the other components in the chain and is not limited to the amplification power alone. Choosing them correctly is of the utmost importance.

Passive soundbar
This Definitive Technology Soundbar is a great example of a Passive soundbar.
It is paired with a receiver that drives
it.

Passive soundbar signal path:

Before the sound signals reach the soundbar, they have to go through several devices.

This chain starts from your source(s) which can be connected to a receiver/pre/pro where the audio processing takes. Calibration and room correction will also be done here.

From the processing stage, the signals are then transmitted to a power amp where they are amplified and made powerful enough to drive the speaker drivers.

The signals are then sent to the soundbar where a passive crossover filters the signal frequencies to the tweeters and the woofers. This is different from an active soundbar where the signals pass through a crossover and then to individual amps (usually class D amps in most soundbars).

Pros and cons of a passive soundbar

Pros:

1.       Better sound quality

As I mentioned above, most passive soundbars have bigger and better-built drivers with better linearity and transients.

Smaller drivers cannot beat larger drivers as far as the sound pressure level is concerned which means that the SPL is usually higher with lower distortion, especially if you listen to high levels.

But as you know sound quality is very subject as can also be affected by the quality of the devices in the chain.

2.       More flexibility

Making upgrades with a passive soundbar and receiver is much easier since you can add more speakers depending on the number of powered channels on your receiver or power amp.

You can also change components at will as long as your budget allows you or add height speakers for 3D sound bubbles.

However, when adding more speakers to your system it is recommended to stay within the brand for better matching and sonic characteristics.

3.       Passive soundbars are lighter

When compared to active soundbars, passive soundbars tend to be lighter since they only have speaker drivers and the crossover network within the cabinet.

Cons:

1.       More technical to setup

Passive soundbars may be lighter but they are larger due to the larger drivers which can make setting up and finding the right position to place it more challenging.

You also need to ensure that the amp or receiver and the soundbar are matched correctly. Impedance is the most important thing to pay attention to but some receivers will have an impedance switch for an easier setup. However, if you have a more powerful receiver or power amp, matching the impedance should not be much of a problem.

The wiring also needs to be done correctly ensuring that the speaker wires do not run next to power cables to reduce interference.

Calibration will also require some technical know-how, especially if you are setting up surround sound. Your receiver/pre/pro may have auto-calibration but, in most instances, you will be required to do it manually using an SPL mic and a white tone.

If you add a subwoofer the crossover should be set properly, but usually, the crossover should be set at around 120 Hz to 100 Hz for a passive soundbar.

2.       Passive soundbars are costlier to set up

Most passive soundbars are expensive when compared to their active counterparts. This is mainly because of the superior quality of the drivers which ensures that the sound quality is way better.

However, this higher cost does not account for the fact that you need to buy a receiver or a preamp and a power amp.

The cost of setting up a passive soundbar system could easily reach and exceed $1000 but for the superior quality, this price may be worth paying if it is within your budget.

Which is better?

Both soundbars are great for a small or beginner setup whether it is in your media room, dedicated home theater, or even bedroom sound system.

However, whichever system you choose will depend on how much money you are willing to spend, whether you want better convenience or more powerful speakers, placement and so.

Passive soundbars are not powered and require external amplification but sound better in general. You also have to ensure that you match the soundbar to other devices in the system which can be complicated at times.

On the other hand, active soundbars have built-in amplification, DSPs and in other cases are equipped with equalization software that optimizes them to better suit your room layout. They are also cheaper overall.

So, it all comes down to what better suits you and how much you want to make changes to your system in the future.

Granted, this guide should help you make a better buying decision.