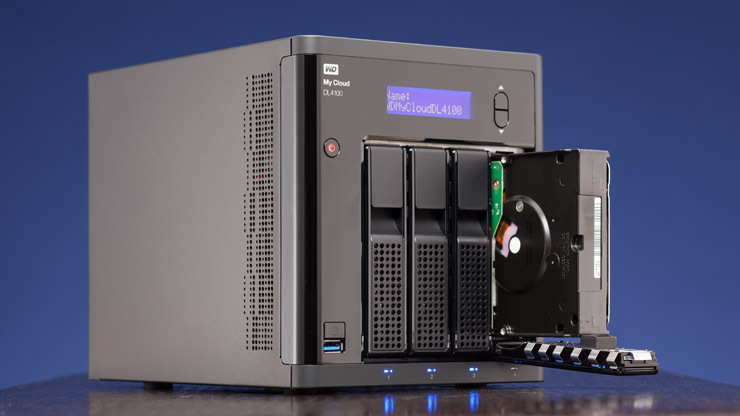
Having a media room server for your media room or home theater entertainment system is a great way to consolidate and back up all your movies, music libraries, games, family photos, and so on.
There are 2 main ways you can set up a home media server for your entertainment system namely;
- Using a dedicated NAS (network-attached storage) system- A dedicated NAS home server will comprise of a NAS enclosure with hard drive bays where you can put and add NAS hard drives which will then be connected to your local network to access your files from anywhere with an internet connection.
- Repurpose/turn your old computer into a network-attached storage server- This will involve installing and setting up media server software on your home computer connected to the network and using it as a media server. Some computer operating systems may already have built-in server software.
But first, let us look at what network-attached storage is, what it does, and how it can benefit you.
What is NAS (Network Attached Storage) and why is it important?
Network-attached storage or NAS is a computer connected to a network with one or more storage drives and an operating system/NAS system that you can use to store your files, programs, movies, receipts, and so on. NAS servers also allow you to access the stored files from any location with internet access.
When compared to storing all your data in external drives, you or other people can access the stored data simultaneously as it is cloud storage.
NAS servers also allow you to back up all your data by either setting up redundancies with 2 or more storage drives or using a clustered NAS. A clustered NAS server is where you set up 2 or more home servers at different locations with the ability to distribute data between them and can also work simultaneously.
Apart from using a NAS server for entertainment purposes, you can also use it to run a small business, upload, and access important files. This can come also come in handy if you have employees that you want to access the data at the same time, something that is hard to accomplish using data stored in an external hard drive.
So, why would you use a NAS server instead of using cloud-based storage services such as google drive, iCloud, One Drive, and so on?
Let us look at some of the benefits of using a NAS home-based server.
The benefits of a NAS Home Media Server
- It is free– Cloud-based services can offer you free cloud storage but are usually limited, typically around 5 and 10 gigabytes, which let’s face it, is barely enough for your movie collection. Other than that, you have to pay an additional monthly fee for more storage. However, once you set up a home server and get it connected to your network, that’s it. You can only incur extra costs the moment you decide to expand the storage or when you are replacing your drives.
- You can access all your files and stream your media from anywhere as long as you have an internet connection– All you will need is a local web to stream your content from anywhere.
- File sharing– With a NAS server system, you can share data between different devices without an external hard drive or pen drive. You can export files from one device to the server and access the files from multiple devices/computers connected to the network (Mac, iOS, Windows, Linux, Android, and so on). These files can be accessed by your family members, friends, and even employees if you allow them to.
- Privacy– Unlike cloud storage services that are susceptible to hacking and data leaks, a home-based network that you control is more secure. We have had instances where these cloud services were hacked and where we saw massive data leaks.
- Well-organized home media such as movies, music libraries, photos, etc. on your cloud. Remember that a NAS server is a computer system.
The drawbacks to using a NAS network
- Can be expensive to set up The price of setting up a NAS server can rack and become super expensive, especially if you are setting up backups in a different location. Also, if you use more drives as redundant storage containers (RAID), you will be racking up twice the price to get 2 hard drives that will store the same thing (one drive stores, and the other acts as a backup in case of damage).
- NAS servers can be difficult to configure- This is more likely to happen if you are setting up your NAS server by repurposing your computer. Usually, most dedicated NAS enclosures will come with their system and mostly have onscreen instructions on how to set up and are, therefore, easier to set up.
- Transfer speeds limit you- Depending on the transfer speeds, you can be limited to how much you can do with your NAS server. But this should not be a problem if you are only using it for media and entertainment purposes. However, some NAS enclosures will have more than 1 ethernet port and other upgrade options that can allow you to expand and speed them up.
How much will it cost to set up a home media server for my entertainment system?
- Good quality enclosures for dedicated servers like from Synology go for between $400 and $800 per enclosure. You can also get a high-quality desktop computer with server-grade gear for around $400 enough for your needs (the desktop option is cheaper with better functionality).
- Hard drives for the NAS system will cost around $80 per 2 TB drive. An 8 TB hard drive will go for around $200, a 10 TB for around $250, and a 14 TB for around $360 give or take. You can use 2 or more drives depending on the number of HDD bays on the enclosure. This can be used to set up redundancies or a backup in another location with another server. The price will vary depending on the kind of setup you want. You will also need to use a server OS compatible with your tablet, phone, TV, TV box, and so on.
- The price of NAS OS and management software can vary from as low as $50 to as high as $500 for a server dealing with a lot of files. Most premade NAS enclosures come with a free lightweight OS enough for your needs. For repurposing an old computer into a NAS server you will need to install an OS that you can also use a free OS such as FreeNAS or invest in one for better performance.
Some examples of NAS operating systems;
| NAS OS | Description | Cost |
| FreeNAS | FreeNAS is an open-source NAS OS that allows you to share data over your network | Free |
| Xubuntu | Xubuntu is a Linux-based operating system that can also be used as a NAS OS | Free |
| XigmaNAS | XigmaNAS is a dedicated NAS server management operating system | Free |
| Amahi | Amahi is easy to use as a Home media server Operating system great for your storage needs | Free |
| Synology DSM | This is the OS used for Synology media servers | Comes with purchase of a Synology server |
| Openmediavault | This is a Debian-Linux-based operating system for a NAS server | Free |
These are some of the main costs that you will incur when setting up the server. However, you can have additional costs to customize the network. A good example would be adding a TV tuner card to the motherboard that can let you record some of your favorite shows and store them on the server.
I am also assuming that you have all the other components such as ethernet cables, a TV, speakers, a good internet connection with enough bandwidth, and so on.
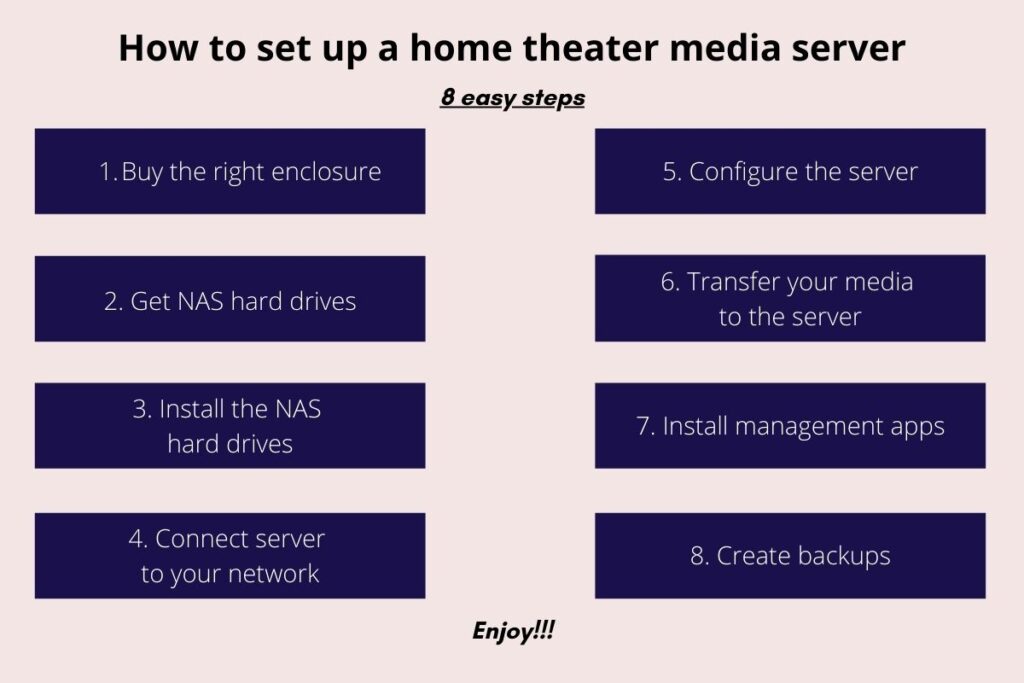
How to set up a NAS media server, step by step
1. Buy the right NAS enclosure
If you are looking for a good dedicated NAS enclosure, you will need to check the specs such as;
- The RAM– I would recommend at least 4 GB of RAM. At least 1 GB of RAM for every 1 TB of storage. Also, for the RAM (Random Access Memory), ensure that it has ECC (Error Correction Code) and helps detect and correct memory errors that can even cause you to lose your data. ECC RAM will have 9 memory chips instead of the usual 8.
- CPU performance– This will be dependent on the number of cores and processor model. I would recommend core i5 or higher, especially for heavier workloads. Core i3 can also serve you well for lighter workloads.
- Connectivity– Some enclosures will have built-in Wi-Fi, Ethernet ports (one or more), or both.
- Disk bay capacity– This can vary from 1 to 16 slots for the hard drives. A good recommendation would be to get one with at least 4 disk bays for redundancy or RAID (Redundant Array of Independent Disks). An enclosure with 4 or more disk slots will support a RAID 6 or RAID 10 configuration (more on RAID below). If your enclosure has 1 or 2 slots it will support RAID 0 or RAID 2.
- The shape, size, cooling mechanisms, and other form factors can affect the performance of the enclosure. A tower-type enclosure will be great for a home theater media server for general entertainment and small business.
- Ease of use– I would recommend choosing a NAS enclosure with an easy user interface that can be easily set up with minimal effort.
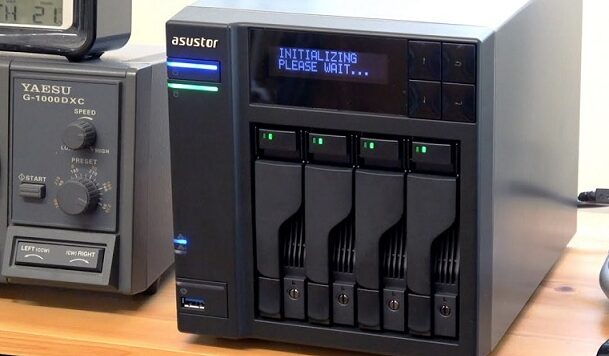
For a desktop enclosure, you can buy a built one with server-grade parts for greater compatibility. The computer should have gigabit LAN with a standard ATX PSU power supply unit) and motherboard.
The other components should have similar specs to the ones mentioned above for the dedicated NAS enclosure. You can also take out other components such as graphics cards, soundcards, and so on if you do not plan on using the server as your computer to it.
If you are going to use a desktop computer enclosure, consider the same specs as they are the most important for a home media server. It should not be filled with other unnecessary components such as graphics cards but if you are getting a deal for a cheap used desktop, buy it and take apart the components such as sound cards that are not essential.
2. Get the hard drives
Some desktop computers and all NAS casings use 3.5-inch HDDs. Most of these hard drives, especially WD drives, will be color-coded as follows;
- Blue and Green HDDs are mostly for general use such as gaming and browsing.
- Black HDDs are mainly used for slightly heavier duties such as content creation.
- Purple for processes that require continuous operation such as surveillance.
- Gold HDDs are mainly used for centers that have multiple users such as data centers.
- Red HDDs are the ones that are mostly used for Network Assisted Storage (NAS). This is the one you will need to use, hard drives that are made specifically for NAS networks.
Hard drives for NAS servers are designed to run 24/7 at higher speeds with their anti-vibration and heat-resistant mechanisms.
They are also configured for RAID:
| RAID 0 | Strips data across 2 drives meaning that the data is written across the 2 HDDs to double the performance and use the full capacity of both drives. No internal redundancy is provided. |
| RAID 1 | 2 drives mirror each other meaning that the same data is copied across the drives seamlessly and continually. If one disk fails, the other is left as a backup. |
| RAID 5 | Data is both striped and mirrored across 3 or more drives. If one disk fails, it can be replaced by another with no data loss. |
| RAID 6 | Identical to RAID 5 but uses one more parity block, meaning that drives can fail and the system will still be functional. |
| RAID 10 (RAID 1+0) | Combines RAID 1 for mirroring and RAID 0 for striping of data. Requires at least 4 NAS drives |
These are the configurations that are used for most of the home media servers and the ones you should get yourself familiar with.
With these features, an initial investment for a NAS HDD may be expensive but it is worth it in the long run. They are less prone to failure from heat and vibration and in the long run, it is all about reliability.
How to choose a good NAS drive
The main considerations one makes when choosing a NAS drive are the available storage (the more storage, the better) and the speed of the drive (spindle speeds should be high). However, these are not the only considerations to make. Other factors to consider before buying include;
- Vibration and heat control– If you have more than one drive in your enclosure, there will be vibrations, heat generation, and noise. A good NAS drive should have anti-vibration tech and thermal control mechanisms while maintaining high spindle speeds for better performance.
- Ability to operate 24/7– The drive should have a high workload rate of around 300TB/year and a lifespan (MTBF) of around 1 or more million hours when in operation. This will ensure that the drive(s) can work continuously and seamlessly 24/7.
- Add-on services– These services include health management, data recovery services such as S.M.A.R.T (self-monitoring, analysis, and reporting technology), and a warranty (should be at least 2 years). S.M.A.R.T lets you know if your disk is at risk of failure and is by far the most important add-on.
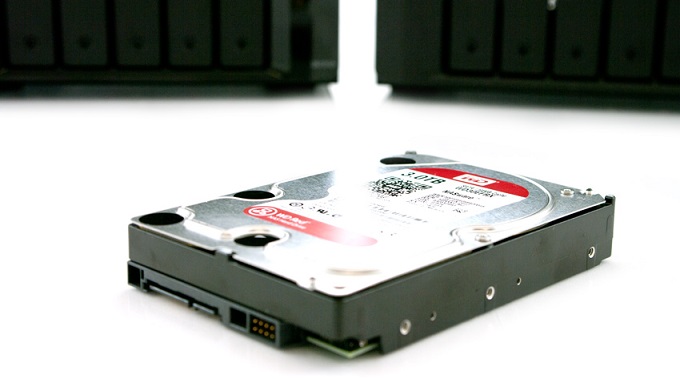
Although NAS HDDs are great and will serve your home theater needs, for faster read and write speeds, you can invest in NAS NVME SSDs that are way faster. With SDDs, your server will be able to serve you better for heavier workloads.
3. Install the NAS drives
Different NAS enclosure models will have different HDD installation means. You will need to read the instruction manual to know how the drives will be installed for that model. Some enclosures may come with pre-installed drives but these will be way costlier.
However, for most enclosures, you will only need a screwdriver to get the job done. You can screw off the back panel to reveal the HDD drive cage and simply but carefully screw the drives into the slots. Some casings will have removable trays where you can mount the drives and insert them back into the enclosure.
After fitting the drives, you can then connect the NAS enclosure to power and internet then turn it on. For the fastest transfer speeds, I would recommend using a Cat 6 cable which you can then connect to a high-performance router.
But as I mentioned earlier different NAS casing brands will have different means of disk installation but the above method should work for most of them.
4. Connect the NAS server to your Network
To get the most out of your home media server, you will need a fast network.
Most if not all home media server enclosures will have at least a one-gigabit ethernet port (GbE) which allows you to have transfer speeds of up to 1000mbps (1Gb per second). Connect your server to the network using a Cat 6 (can handle up to 10 Gb/s) or Cat 5e cable (can handle up to 1 Gb/s). You can also connect the server to your network wirelessly but this will not be as reliable.
Your router should also be high performance with transfer speeds of at least 1 Gb/s.
5. Configure your home media server
After connecting the media server to your network, connect it to a monitor, install a server OS using a bootable drive if it does come with a pre-installed one, and start the NAS server.
You may also need to open the browser for that server. An example of Synology media servers would be Find.Synology.com. This will allow you to get into the user interface using your computer.
Most media servers will have a management user interface (UI) with icons, a desktop, and windows just like any other OS. From the interface, you can set up your username, password, personal domain name, and SSL security for the domain.
You may also need to format your drives once you turn on your home media server to a format that is designed for large storage, for example, Btrfs for Synology. After that, you can then create assigning permissions and shared folders depending on the number of users. For a home theater, you will only need one shared account.
You can create a shared folder each for your music library, another for movie collections, another for your photos, and your games, and you can also have a separate encrypted account for your business/work/insurance documents/bank receipts, and so on.
Each OS will have different configuration steps. The best way to learn how to configure your specific NAS OS is using Youtube videos and other online guides for that specific operating system.
For a desktop computer media server
Computer operating systems such as windows and Linux have built-in software that may need to be activated to use the computer as a server. You can use these but they would not be as effective as a standalone and dedicated media server OS.
I would recommend using a third-party NAS server OS. You can run this operating system using a Live CD, bootable USB drive by dual-booting, or simply install it as a standalone OS on your computer (this will mean clearing any other existing operating systems).
It is important that if you are using your desktop computer as a media server you avoid using it for other tasks. Doing this can slow it down tremendously. Your server will also be live only when the computer is turned on just like with any dedicated media server. You will also need to use OS and management software that is DLNA certified for better performance and security.
You will also need to configure this server and the process will typically be the same but will depend on the software you use.
6. Transfer your media/data to the home media server
Your user manual should also have a guide on how you can transfer data to the server.
You can use a USB cable to transfer from external hard drives, a pen drive, or through your cloud network from other devices (clients). If you do not have a manual on how to transfer the data, you can search for an online manual or call customer support.
Depending on the size of your files and the transfer speeds, the transfer can take from several minutes to hours. Once you are done with the transfer, access the files from anywhere as long as you are connected to the internet or freely in the comfort of your home.
If you still use a cloud-based service such as Google Drive, you can sync it with your home media server to automatically back up files to the home server.
7. Install compatible apps for your home server
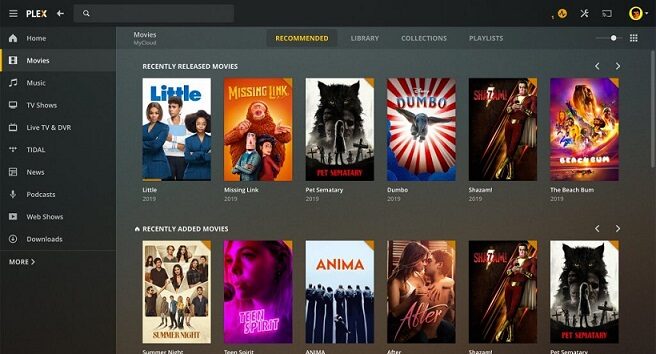
You can browse and install management apps such as Plex to help with backing up data, security, system maintenance, managing and organizing your files, and much more.
Before you purchase any app, ensure it is compatible with your server system.
8. Create a backup
Creating a backup for your NAS system would be logical, especially if you have stored critical files on the server. You can select the files you want to back up or you can create an automatic backup in what is known as a clustered NAS as I mentioned earlier. This will help you prepare for anything such as water damage on your home media server.
However, this will double the cost, but for extra security, it will be worth every penny.
You can also choose to skip this part for now.
You can now enjoy your media server
If you are sold on the idea of having a home media server, purchase the right equipment, and set it up as I explained, you can now enjoy your new setup.
You can view your photos, stream your music library and movie collection, you can also record shows for later viewing, and do much more with the server. This can be done from any of your clients (phone, computer, tablet, etc.) with a media player installed on the device. A BitTorrent client is also great for downloading files.
You are not limited as to how much you can do with the home media server.

