Recent Posts

Home theater cable management (Tips & best practices)

Cable management

Untidy wires can ruin your home theater appearance and even cause accidents. to avoid any of these issues, you should properly manage all your speaker wires, media cables, TV cables, and power cables.

There are several ways to manage and conceal your cables and wires in your home theater for a better and cleaner setup.

  1. Label all your wires and cables.
  2. Separate AV cables form the power cables.
  3. Tie up the wires.
  4. Run the cables and speaker wires through raceways.
  5. In-wall cable concealment.
  6. Install cable raceways

These are some of the ways you can conceal and better manage your home theater wires and cables that we are going to cover in this guide.

1.      Buy the right cables

Buying cables of the right length will come in handy when you manage your cables to reduce clutter and hanging wires.

This is why planning your home theater and knowing where everything is going to be placed is very important. Not all your devices will use cables of the same length but depending on where you are placing your devices, you can invest in cables that are neither too short nor too long.

However, you may need to buy wires and cables that are longer than the intended length in case you need to do any modifications to your system.

You will also need to invest in a well-designed power surge protector and use one power outlet per wall. The power strip should have enough outlets to handle your home theater components comfortably. I would recommend getting high-quality power strips with well-spaced side outlets from recognized brands.

2.      Label all wires

When you are dealing with a lot of cables and wires it is always important to label all of them to avoid any confusion later on by knowing where all the cables are running to.

You can buy some color-coded labels for your speaker wires and the rest of the cables but you also have the option of making your DIY labels using a marker and masking tape. Wire labels do not cost much and can be bought from your local stores or online for cheap.

This may seem obvious but fail to label all your cables from the word go and you could easily lose track of where they are supposed to run once you begin your installation.

3.      Manage your TV cables

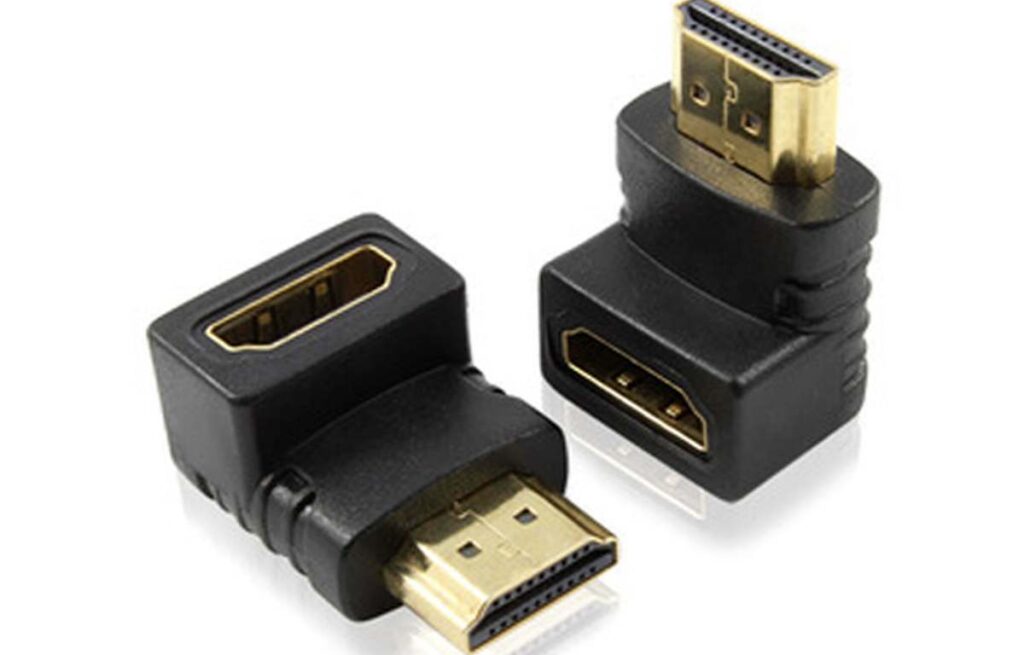
Use 90° HDMI couplers

If you are planning to wall mount your TV close to or on the wall, you will need 90° HDMI couplers for your media devices to reduce bend-stress on the HDMI cables at the neck before they go into the ports.

This will keep the HDMI cables running smoothly behind your TV in tight spaces.

90 degree hdmi coupler
90° HDMI couplers

Run the TV cables through the TV stand

Running the Tv cables through the back of the TV stand is a great way to hide the cables.

If your TV is wall-mounted, you can install an on-wall cable channel to feed the cables to the TV. You will only need to use a screwdriver to secure it to the wall and a hacksaw to cut it to the right length.

Another way to hide TV cables on a wall-mounted TV and prevent them from dangling is by using customizable raceway kits or cord covers. These can be mounted on top of the wires or stuck on the wall using an adhesive for you to run the cables through.

You can also repaint the cable concealer to match the color of your wall for a seamless blend.

Feed your TV cables through the wall

In-wall TV cable concealment is popular among home theater owners.

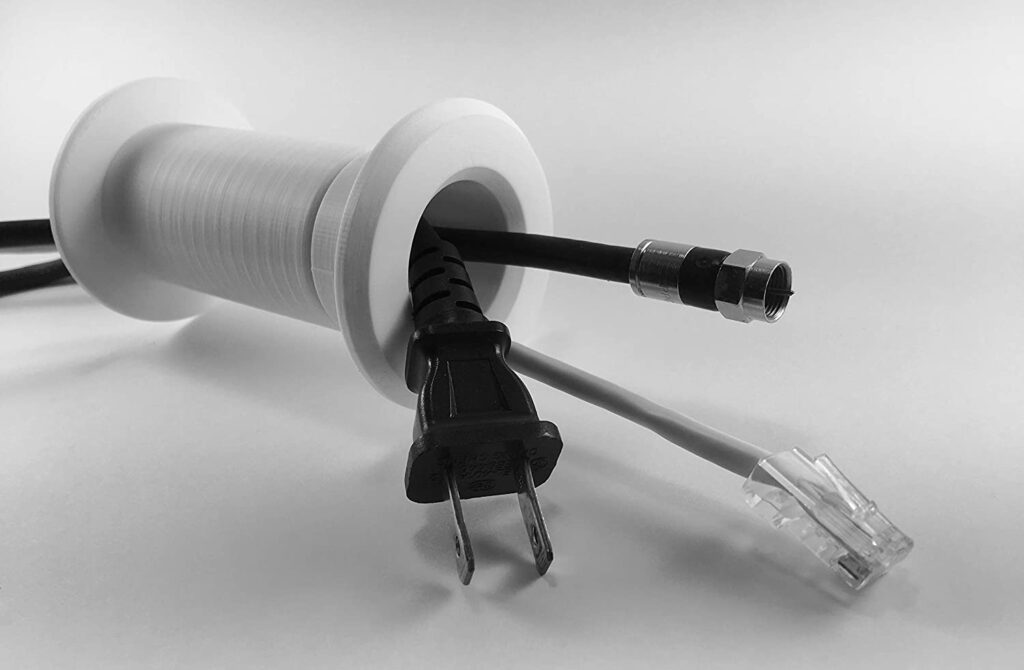
This can be done by drilling the drywall behind the TV and using in-wall-rated cables or using any of the following;

  • Pass-throughs for powered cables that have slots for running both the power cables and media cables. To install these power cable pass-throughs, you will need to cut the perfect hole, install the brackets, and run your cables through the brackets.
  • Cable pass-through grommets for audio and HDMI cables. You will need to cut fitting holes for the grommets, install the grommets then run the cable from the top to the bottom.
Cable pass through grommets
Cable pass-through grommets

It would also be a great idea to get a professional to do in-wall cable concealment for your TV cables. This does not cost much or take much time.

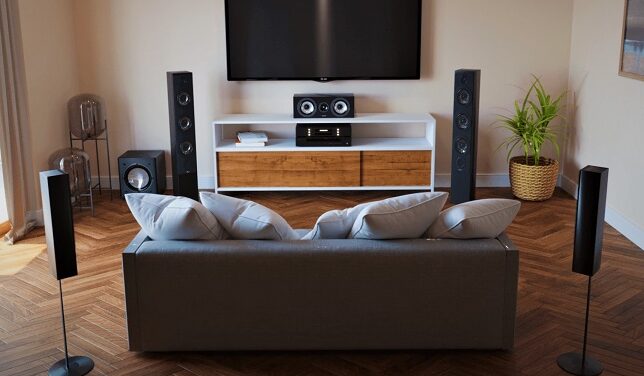
4.      Hide speaker wires

Before you begin make sure you have the right speaker wires with the right length depending on the wire gauge. For a length of 20 feet or less, use a 16-gauge wire but if the wires will run for longer than 20 ft, use 14-gauge or thicker wires.

Also, if you live in a rented space, you should double-check with your landlord before doing any major modifications.

Install plastic cable raceways/covers

Cable raceways/covers/ducts can be used to hide your speaker wires.

Raceways come in a variety of shapes and sizes and can also have an adhesive for attachment to the wall, elbow joints, covers, connecting pieces, and even screws. You can run cable raceways around doorways, up walls, and above baseboards, and can also be painted to match the color of your wall. However, removing raceways is not easy as they leave traces at the points of attachment.

An alternative to raceways is using cable covers that are rounded at the top and flat at the bottom. They do not always need adhesive to hold them in place.

You will need to make sure that the cover or raceway you are buying is big enough to run a bundle of wires.

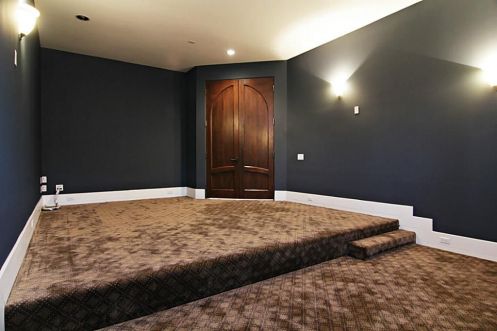
Fit the speaker wires between baseboards and carpets

Most rooms will have baseboards with spaces between them and the floor for carpeting. You can use a stir stick or ruler (avoid sharp objects that can cut the wire insulation) to tuck your speaker wires between the carpets and baseboards.

This may not always work, especially for speaker wires with smaller gauges but if there is enough space to fit the wires, avoid running them through the side where the door is.

You can also run the speaker wires through the corners of the floor under the carpeting if they are too thick.

Use wire ties and adhesive pads

For a bundle of speaker wires, tie them together using wire ties then attach them to your walls’ moldings using adhesive pads or cable clamps.

After attaching the wires to your walls, you can paint over them to match the color of the wall and camouflage them.

This cable concealment option can also be used for TV cables and other cables in your home theater.

Use super-slim adhesive speaker wires

Super-slim speaker wires are flat wires that are mainly 16-gauge wires with 2 or 4 conductors. These speaker wires are mainly low-voltage wires that come in different varieties. You will also need flat speaker wire terminals pairs for each speaker if you decide to use this option.

To install these wires, you will need to stick the adhesive side to the wall which will leave the paintable side exposed. You can then paint over the wires to make them blend in for invisible concealment. However, you may have some noticeable lumps where you may be forced to bend the wires at corners.

When using flat speaker wires, you can leave the plug terminals exposed at the ends or use junction boxes to add better style.

Hide the speaker wires inside the wall or ceiling

Running your speaker wires through the walls and the ceiling will require more work. However, you can do it by yourself or hire a professional to do it for you.

You can also use in-wall and in-ceiling speakers if you decide to take this route but more planning will be needed.

Even without in-wall or in-ceiling speakers, you can still fish the speaker wires after cutting holes where you can run the wires through. You can then install grommets/plates/junction boxes at the hole cuttings where the ends of the speaker wires will pass through.

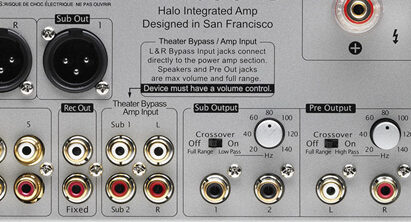
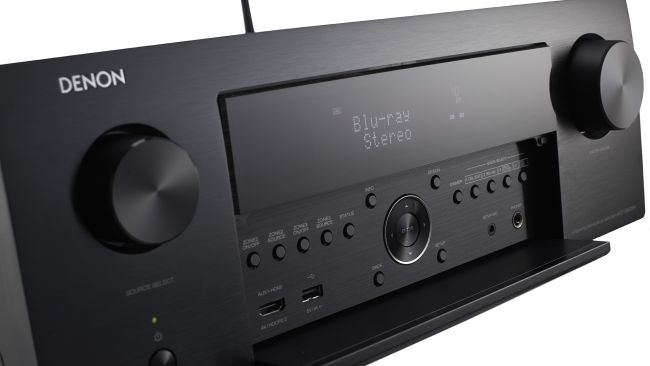
5.      Organize cables behind your component rack

If you have a component rack where you keep your receiver, amplifier, consoles, Blu-ray player, TV box, and so on, you are going to have many cables and wires running through.

You can use wire ties or zip ties to bundle the cables together but do not crunch them too tightly as this can damage the insulation.

Tie the power and AV cables separately to reduce electromagnetic interference then cut off the excess ties. After this, use adhesive pads or clamps to attach the cables to the cabinet or rack for a cleaner look.

6.      Use chair rail molding

To install chair rail molding you will need to do a deliberate and considerable amount of planning when building or re-building your home theater. You will need to measure your wall to determine how much molding you will need.

After installing your studs, you can mount the rail molding to the wall firmly. The molds need to be cut perfectly to fit each other precisely at each end.

Go wireless

If you want to avoid all the hassle that comes with managing and concealing all your cables and wires, you can always use wireless components. These components can then be connected by either Bluetooth or Wi-Fi.

You will also have a lot of flexibility when it comes to where you can place your speakers and other devices without having to worry about the length of the cables.

However, you should note that going fully wireless is more expensive.

Home theater (HT) bypass explained (Combine Stereo & surround sound)

Home theater bypass

Home theater bypass or HT bypass is a line-level input connection on high-end preamps or integrated amps that bypasses their audio processing and compression for 2-channel audio. This allows a home theater to double as a hi-fi music room.

To use this feature, an AV with the front left and right preouts is required as AVRs are not ideal for Hi-Fi stereo.

For music purists, HT bypass is handy as it allows them to indulge in movies and music in one room.

Here’s how it works…

How home theater bypass works

Integrated amps with HT bypass allow home theater users to use their front left and right speakers for both 2-channel Hi-Fi and surround sound (5.1, 7.1…).

Thus, you can listen to uncompressed audio from a CD player, turntable, or other sources since the audio processing on the integrated is bypassed. Audio processing is great for movies but not so much for Hi-Fi.

Additionally, with this feature, you don’t have to tweak the volume level, gain, or EQ for the front left and right speakers each time you switch between 2-ch and surround sound. This, the volume level is set on the AV receiver.

However, not all integrated amps or preamps have this feature. Check the specs sheet for RCA inputs labeled as “Home theater bypass“, “Direct“, “Tape“, or “Processor input“.

Connecting home theater bypass

You need 2 RCA cables to complete the connection between the AVR’s left and right preouts and the corresponding bypass inputs on an integrated or preamp.

This bypasses the preamp stage gain on the integrated allowing you to use it purely as a stereo power amplifier.

With this, volume adjustments are done at the source or surround-sound processor (AVR).

How to use HT bypass infographic
How to use HT bypass

What this means

You don’t have to splash money on a dedicated music room as you will be able to switch between surround sound and 2-channel Hi-Fi with one press of a button without needing an external switch.

All you will need is;

  • A surround sound processor with a preout section,
  • An integrated amp or a preamp with HT bypass and a power amp

The center, surround, and/or height speakers will be powered by the AV receiver while an integrated or power amp powers the front left, and right speakers. Thus, the front left and right audio channels pass unprocessed to the stereo amp.

The gain on the second preamp stage is also bypassed and the AVR for used for volume adjustment for stereo surround sound.

HT bypass alternative

This alternative is useful for stereo amps that lack HT bypass for combining stereo and surround sound.

Plug the front left and right speakers into the stereo amp or preamp and all the other speakers to the relevant terminals on the AV receiver (center, surround, height).

Connect the front left and right preouts on the receiver to the respective inputs on the amp. You may need to assign the preouts on some receivers (amp assign).

Then connect your stereo sources to your preamp or integrated and the surround sound sources to the receiver.

Fine-tune the volume levels to ensure output is consistent for all speakers.

Drawbacks;

  • Possible sonic inconsistencies between speakers.
  • Expensive. (a bypass setup is also expensive).
  • Unlike HT bypass, sources are switched manually.

Cost is one of the biggest drawbacks to both setups. However, with HT bypass, switching sources is done with the receiver remote.

To Sum up

If you are not too keen on Hi-Fi stereo, a bypass preamp or integrated amp will be of no use to you.

However, for audiophiles that don’t have the luxury of separate music and movie rooms, this feature will come in handy with the biggest upgrade cost being taken up by an integrated or preamp with HT bypass.

With that said, preamps or integrated amps with HT bypass can be quite expensive.

AV Receiver listening modes & Surround formats explained

Av receiver listening modes

Modern Audio/Video receiver listening mode can be confusing and it can be hard to choose the right one for your home theater. These modes are not only found in AV receivers but also in preamps and integrated amplifiers.

It is important to know which mode to choose for your setup for the best experience, something that is going to help you do by explaining the different modes.

AV receiver/preamp/integrated amplifier listening modes include;

  • THX Cinema
  • DTS-MAHD
  • Stereo
  • PlIIz
  • DTS Neo-X Music/DTS Neural:X
  • Dolby Atmos
  • DSD
  • Dolby Digital and Dolby Digital plus
  • Direct mode and Pure direct
  • Dolby True HD

These are just some of the examples but the list is huge. Before we go into the details of each listening mode, there are several things that you should know.

What is a receiver listening mode?

A receiver listening mode is preset on your audio/visual processor that tells it how it should play the audio signals that come from your sources. Choosing the right listening mode can transform the listening experience in your dedicated home theater or media room with stunning sound and high fidelity.

For example, if you are watching an adventure movie, you may want to use one of the surround modes such as Dolby Atmos for an immersive, directional, and object-based sound format.

Depending on the audio that is being played and how you want to hear it, you can choose one of the listening modes. However, they are not always named as listening modes in all audio processing devices. Other terms that can be used to refer to this are;

  • Sound mode
  • Decoding mode
  • Sound field
  • Sound program

These modes can also be broken down into compressed or uncompressed modes and by this, I do not mean the audio quality. Compressed sound modes are digital modes that we are used these days like DTS-X or Dolby Digital while uncompressed sound modes are the more traditional/analog modes that are mainly transported through RCA cables.

This brings me to the next point that can best help you understand the different listening modes.

Audio encoding and audio decoding

Remember how I told you about uncompressed and compressed sound modes. The thing is, you can play uncompressed directly from your source to your speakers but it is a different case for compressed sound modes.

Compressed sound modes are sound modes that have been transformed from uncompressed formats (analog) to a compressed formats (digital). This is what is known as audio encoding. A good example of an uncompressed sound is your voice.

Audio decoding, on the other hand, is where the compressed sound mode is unpacked in an audio processor such as a receiver and sent to the speakers in a form that you can hear. So, if your audio processor does not decode a certain encoded sound mode, you will not be able to hear it.

There are three main listening mode categories that you need to know about;

  • Direct
  • Licensed
  • Proprietary

Direct

Stereo

Sends sound to the front right and left channels plus the LFE channel.

You can use this sound mode when you are watching older CD movies, songs, and shows that were recorded with 2 channels.

When you play a multichannel soundtrack or movie with this mode the audio signals are combined into the 2 front channels and subwoofer with no additional sound processing.

Mono

This listening mode sends the same signal to both the front right and left channels.

Suitable for watching older movies and soundtracks that were recorded in monophonic (mono) sound production.

Full mono

Outputs the same audio to every speaker regardless of the position or channel.

Multichannel (Multi ch)

Passes the unchanged (uncompressed) sound to the speakers. Great for playing audio from multi-channel PCM (Pulse-code Modulation) sources.

Direct

This mode plays the audio as it was recorded without processing and can be used for both digital and analog sound.

For example, if you play a 2-channel soundtrack, only the 2 front channels will play the audio regardless of the number of speakers you have.

Pure audio (Pure Direct)

Pure direct is the same as direct but in this case, the video (DSP) processing is turned off for a better high fidelity by lowering the noise.

All channel stereo (party mode)

All channel stereo mode takes the stereo audio (front left and right) and puts/clones it to the surround and back speakers.

Not great for critical listening as you lose the front sound stage appearance but is great for parties.

Licensed

Dolby Pro Logic II (PLII)

Dolby Pro Logic II creates a 5.1 channel from stereo signals (2 channels) by using hidden audio cues in the 2-channel signals. This mode is mainly used for watching stereo-only non-HD TV channels.

Pro Logic IIx (PLIIx) expands a 2-channel or 5.1 channel audio signal for a 6.1 or 7.1 channel playback providing support for additional speakers and a seamless surround sound.

Pro Logic IIz (PlIIz) expands 5.1 or 7.1 channel audio signals to a 9.1 channel or 7.1 channel with an additional of 2 front height channels. By doing this, the PLIIz mode adds more depth to the sound in your home theater.

Dolby Digital (Dolby D, DD, or AC-3)

Dolby D is made up of 6 discrete channels, 5 for the speakers, and one for the LFE channel (subwoofer).

Dolby Digital plus (Dolby D+ or E-AC-3) is an enhanced 5.1 channel Dolby Digital-based sound mode adding more channels (up to 15.1) and improving the surround sound with little compression. This mode can be used when streaming from your phone, tablet, computer, or when you are playing some Blu-rays.

Dolby TrueHD is a lossless sound mode that is great when you are playing Blu-ray movies for high-fidelity audio. And like the Dolby Digital+ mode, Dolby TrueHD can also support up to 16 channels.

Dolby Atmos

Dolby Atmos is a precise object-based surround sound mode that creates the illusion of sound moving around you. This listening mode can be used for a 5.1 or 7.1-channel setup and also takes advantage of height speakers when playing movies that incorporate Dolby Atmos audio.

DTS (Digital Theater Systems)

DTS is a surround mode that is ideal for playing movies/soundtracks recorded in DTS. This mode can be used for up to 6 discrete channels (5.1 channels) for high-fidelity sound.

DTS 96/24 sound mode is great for playing audio from 96/24 (96 kHz sampling rate + 24-bit resolution) sources.

DTS-HD HR (Digital-HD High resolution) mode can deliver audio for up to 7.1 channels at a 94 kHz sampling from Blu-ray or HD DVD sources.

DTS-HD MSTR (DTS-HD Master or DTS++) sound mode can deliver sound at a sampling rate of 192 kHz and 24-bit for an unlimited number of channels. Similar to DTS-HD HR, DTS++ can be used for HD DVD and Blu-ray soundtracks.

DTS Express can be used to play audio from DTS express sources.

DTS Neo:6

DTS Neo:6 is a post-processing surround sound mode that enhances a 2-channel audio signal in a home theater. It does this by analyzing sonic cues in the 2-channel signals and distributes the sound into 6 channels on Blu-rays and DVDs.

DTS X

DTS X is an alternative to the Digital Atmos sound mode as it is also an object-based surround sound mode. This mode also creates an immersive, multi-dimensional, and lifelike sound from DTS X Blu-rays, DVDs, and online movies.

DTS Neural:X

DTS Neural:X is an upmixing surround sound format that creates an imitation of the DTS X listening mode for up to a 5.1 channel set up with height speakers.

DTS-ES (DTS Extended Surround)

DTS Extended surround sound mode allows for the addition of an extra channel to a 5.1 channel surround sound setup. This mode can come in either DTS-ES 6.1 Discrete or DTS ES-Matrix.

DTS ES 6.1 discrete is used to play DTS-ES soundtracks in a setup that has extra rear channels for a 6.1 or 7.1 playback.

DTS ES Matrix is used to play DTS-ES soundtracks providing a matrixed center-surround channel and 5.1 discrete channels.

Auro-3D

These sound formats allow for the addition of height speakers in a 5.1 speaker setup and can be found in newer Marantz and Denon receivers. However, if you have older models, you can do a paid upgrade to have this format as an option.

Proprietary Modes

These are legacy formats from a manufacturer trying to show that they have more features than other receiver manufacturers. I would not highly recommend using these sound modes.

Onkyo receiver listening modes (proprietary)

Mode Description
OrchestraIdeal for playing operatic and classical music and emphasizes the surround sound channels to stimulate a large hall natural reverberation and widen the stereo image.
Game-RockFor rocky games
Game-ActionFor action games
Game-SportsFor sports games
Game-RPGFor Role-playing games
Studio mixFor Pop or Rock music.
T-D (Theater-Dimensional) For surround sound imitation in a set up with 2 or 3 speakers.
UnpluggedFor vocals, jazz, and instrumentals.
TV LogicFor Tv studio shows.
THX Games/Music/CinemaFor games in a surround sound environment, cinema for mimicking a movie theater or large hall and music for music sources with higher recording quality than movies.
THX select Cinema/Games/MusicUses THX ASA tech to create a broad music field, Expand the surround environment in cinema, and create a 360° in multichannel games.

Denon sound modes (Proprietary)

Mode Description
AutoDetects and automatically changes the sound mode depending on the type of audio signal.
Rock ArenaFor stimulating the sound experience in a live arena.
Jazz ClubFor stimulating a Jazz Club experience.
MatrixFor adding a spacious surround effect with stereo sources.
Video gameFor video games.
VirtualFor creating a surround sound effect with your headphones or stereo speakers.

Yamaha listening modes (Proprietary)

Mode Description
EnhancedFor a sound field that emphasizes 3D object sound.
Sci-FiFor SFX and Sci-fi movies.
SpectacleFor an expansive soundscape and wide dynamic range.
StandardFor surround sound emphasis without interfering with the original positioning.
DramaFor comedies, dram, and musicals.
AdventureFor adventure and action films.
Action Game For action games.
Roleplaying GameFor adventure and roleplaying games.
Opera/ReticalFor reproduction of a live concert hall with emphasis on voice clarity and depth.
Music VideoFor emphasis on rhythm and hall reproduction effect for jazz, pop, and rock concerts.
SportsFor light entertainment and sports.
Hall in Amsterdam/Vienna/Munich Stimulates a 2200-seat Amsterdam concert hall with a show box shape, a 1700-seat Vienna concert hall with a show box shape, and a Munich 2500-seat concert hall with a wooden interior respectively.
Church in Royaumont/FreiburgCreates an imitation of a Gothic monastery dining hall and a narrow and long stone respectively.
ChamberFor reproduction of wide space with a high ceiling.
The Bottom LineFor stimulation of a New York 300-seat jazz venue.
The Roxy TheaterFor stimulation of a 460-seat rock music venue.
Cellar ClubFor stimulation of a low-ceiling concert venue.
Warehouse LoftFor stimulation of a concrete warehouse.
Village VanguardFor stimulation of a small New York Jazz Club.

Pioneer Listening modes (Proprietary)

Mode Description
Advanced GameFor games
ActionFor action movies
ClassicalFor operatic and classical music.
DramaFor TV studio shows.
Ent. Show (Entertainment Show)For pop and rock music. Creates a powerful acoustic image and lively sound.
Ext.Mono (Extended Mono)You heat the same sound regardless of your position in the home theater room.
Ext. Stereo (Extended Stereo)Creates a stereo image by cloning the stereo sound signals to the surround speakers.
F.S Surround (Front Stage Surround)Imitates a surround sound experience even with 2 or 3 speakers.
UnpluggedFor vocal, jazz, and acoustic instrumentals.
Pop/RockFor rock music.

Sony Receiver Sound Field (Proprietary)

Mode Description
HP DirectAutomatically outputs uncompressed analog signals to your headphones
HP 2CHBypasses the sound field processing and the multi-channel surround formats downmix the audio signal to 2 channels to be played on headphones.
TheaterFor the general living room.
DynamicFor an environment that lacks a spacious feel but reverberates. Emphasizes sound reflection.
HallFor reproduction of the acoustics in a classical concert hall.
Live concertFor the acoustic reproduction of a 300-seat live concert house.
StadiumFor large open-air stadium effect.
SportsFor sports broadcasting effects reproduction.
Jazz ClubFor reproduction of a jazz club effect.

To Wrap Up

There are many different listening modes in AV receivers and other audio processors. Depending on your set up some of the modes and formats may be more suited for your home theater than the rest.

If you take your time to look at the different sound modes you can tune your receiver or audio processor to get the most out of it.

Home theater/Media room colors (5 Best colors)

Home theater painting

Paint color affects the mood and feel of a home theater or media room. It can elicit certain emotions that can make or break your viewing experience.

For a home theater or media room, especially one with a projector, a neutral non-reflective paint color will prevent screen glare for the best visual experience. Brightly-colored walls/ceilings reflect light emitted by a TV/projector distorting your color perception and diluting the details.  

Colors are the components of light that beam and reflect across a room. Your display’s color scheme will be impacted by light reflecting and emitting sources that include carpeting and decorations.

Granted, choosing the color for a movie space is a creative process that depends on personal taste. In this article, we will look at how you can streamline this process for the best results.

Choosing home theater/media room color

When choosing a color palette, visualize the intended design and atmosphere.

Nonetheless, there is an assortment of paint colors and shades. But here are some guidelines that reduce reflectiveness to create an immersive projector or TV space while maintaining aesthetics;

  • Choose dark or neutral paint colors
  • Use a muted paint finish
  • Paint the ceiling
  • Avoid glossy décor

Dark vs neutral colors

For a dedicated home theater, dark neutral colors will give optimal results for movie watching.

Dark neutral colors are not necessarily black but include;

  • Dark grays such as charcoal gray,
  • Deep gold,
  • Navy blue,
  • Black,
  • Deep maroons
  • Dark brown
  • Deep red shades such as burgundy and raspberry.

Some examples of dark neutral paints are Tricorn Black and Peppercorn by Sherwin Williams.

In contrast, dark neutrals may be too on your face, especially for a well-lit media room. This is because a media room is also a perfect social space used for other entertainment purposes. In this case, a neutral color will create a more soothing atmosphere.

Neutral paint shades include colors such as black, red, green, and gray (color or preference by many). These shades are versatile and blend well with a variety of colors and textures

Neutral colors can be warm or cool depending on what works for you. For a more inviting space, go for a neutral color with a warm undertone such as brown. Cool undertones such as blue are calmer, more soothing, and fit for a resting space.

For a trendier look, use a monochrome color scheme or a neutral color on the ceiling, carpet, or furniture to block the dark color and open up the space.

When putting together a monochrome color scheme use a brighter and darker shade of the same base color starting with the darker shade. This could be 2 deep red or dark brown shades.

If you find neutral monochromatic colors boring, use a complementary color on the accent wall to add interest and contrast to the space. This could be a vivid color such as navy blue or burgundy in a neutral room.

For any color scheme, stick to 3 to 5 colors that meld well together.

Avoid white or rich shades of blue, green, or yellow. White is too reflective while rich shades of blue, yellow, or green may distort your screen’s color perception. Grass may have an unnatural hue while skin tones may appear slightly yellow or blue.

Choose a flat finish

Different neutral paint colors have different finish sheens. Sheen refers to the reflectiveness of the finish. For a dedicated theater, use a matte/flat finish (concealer).

  • A flat/muted finish is dull, thicker, and more pigmented scattering light for less reflection. This is great for surfaces you want to downplay such as the projector or TV back wall, an accent wall, or the entire room. However, this finish is difficult to clean and unsuitable for walls subjected to a lot of abuse.
  • Satin/Eggshell finishes are a step down from a flat finish with satin being glossier than eggshell. They are warmer, create more depth in your space, and are easier to clean.  
  • A semigloss finish is glossier and smoother than satin/eggshell. This finish can be used on the lower wall portion (wainscot) or walls that require frequent cleaning.

Avoid reflective glossy finishes, especially when using a projector. However, in a low-luster/flat-colored room, a glossy finish can add depth when used on the baseboards or other trims.

Muted walls will frame your TV/projector and make it the focal point. You can also frame the display by using matte neutral paint on the display’s back wall to serve as an accent wall. This could be a black accent wall in a gray space.

What is an accent wall?

An accent wall is a wall with a different color from the rest of the room. It can improve a media room’s contrast making it less monotonous (less boring).

There is a couple of directions you could go such as painting the screen wall with a darker monochrome or complementary color such as brown in a burgundy room.

Paint the ceiling

If possible, use the same color on your ceiling as your floor/carpeting.

A home theater’s ceiling is best with a neutral or dark neutral color such as dark grey. When using a light neutral color on your walls, paint the ceiling with a 50% darker shade to break up the room and create a wall-to-ceiling transition.

A white/beige ceiling may open up the space at the expense of your viewing experience.

Avoid glossy décor

Any decor added to a home theater or media room should be non-reflective.

Decor can be artwork, wool, faux fur, velvet, or carpeting with subtle geometric patterns as a design statement.

It’s also essential to add a neutral-colored carpet to a hard-glossy floor to prevent glare from reflections. Carpeting will also improve the room’s acoustic performance.

Dimmable lights and blinds for the windows will also darken a room when watching a movie.

5 Best home theater colors

1. Black

For full immersion in a home theater, go for the darkest color possible, a muted black to minimize reflections.

Blacking out a room will darken the field of vision for popping visuals but may feel overwhelming and leave you feeling boxed in.

You don’t need to blackout your space when using a TV. Only painting a TV’s back wall will draw attention to it while making it invisible when it’s off.

2. Grey shades

Gray is a neutral lighter shade of black that is low reflective. The shade can be as light or dark as possible while retaining ambiance.

Dark grey shades are flexible and elegant making a space cozier while being moody and dramatic.

Some popular grey paint shades are;

  • Benjamin Moore Berkshire Beige
  • Restoration Hardware slate
  • Peppercorn
  • Westchester grey
  • Software grey
  • Charcoal gray

Note that peppercorn can be quite purple and may clash with blacks or grays with other undertones. This color would be great for a home theater or media room ceiling.

3. Brown and navy

Rich brown is a warm color that can increase interest in your room. Meanwhile, a deep navy color will complement a brown space.

Ensure the color is as dark as possible to be non-reflective.

4. Deep red tones

A deep, dark red color is the color of choice for most commercial theaters. This is an elegant and luxurious color but will require several coats for the perfect shade.

Deep red shades for home theater include;

  • Rosewood
  • Carmine
  • Burgundy
  • Crimson
  • Auburn
  • Cardinal

5. Tan

Dark tan is a lighter shade of brown and another great neutral color for a home theater.

To Wrap Up

Choosing color is a subconscious creative process that makes or breaks a space.

It’s recommended to use a dark neutral shade. However, this could make the room boring but you can alleviate this with décor or an accent wall.  

For a TV back wall, go as dark as possible but avoid glossy paints for your ceiling and walls.    

When in the mood for change, feel free to explore with other color ideas and if possible, add texture to the media room.

5.1 vs 7.1 surround sounds speaker setup and calibration

5.1-Surround-Sound-System (2)

When installing a surround sound speaker system there are 2 options common with most people, 5.1 or 7.1. However, there is no clear-cut winner between 5.1 or 7.1 setups as it depends on preference and other factors that may come into play.

The difference between a 5.1 and a 7.1 surround speaker system is the number of speakers in the home theater. A 5.1 surround has 6 channels, 5 speakers, and one or subwoofers (LFE channel) while a 7.1 setup has 8 channels consisting of 7 speakers and one or more subs. Simply put, a 7.1 surround is a 5.1 surround speaker set up with 2 extra speakers for the rear surround.

When choosing between a 5.1 vs 7.1 setups, there are 3 main factors to consider.

3 factors to consider when choosing between a 5.1 or 7.1 surround

  • The size of your room– Bigger home theater rooms (typically, more than 350 ft²) needs more speakers to fill up the extra space. However, having many speakers in a smaller room (less than 350 ft²) will not only make the sound louder but also muddy.
  • Your listening position– It would make sense to put the 2 extra back surround speakers if you have a lot of space behind your listening position. However, if your seating position is close to the back wall a 7.1 setup would not be of much use.
  • Budget– It goes without saying that a 7.1 surround will be costlier than a 5.1 surround for the same type and brand of speakers. High-end 5.1 speakers can cost you over $6000 and for the 2 extra high-end speakers of the same brand, it will cost you up to $1000 extra. However, there are cheaper entry-level surround speakers that run for under $1000.

5.1 vs 7.1 comparison table

Surround setup5.17.1
Number of channels6 channels (5 standard speaker channels + 1 LFE channel)8 channels (7 standard speaker channels + 1 LFE channel)
SuitabilitySmall to medium-sized roomsLarger rooms
CostCheaperCostlier
Audio qualityStandard surround audioDeeper and more precise audio
FormatsDTS, Dolby digitalDTS-HD Master Audio, Dolby TrueHD
Supported devicesBlu-rays, DVDs, Video games, HDTVMost Blu-rays, Xbox One, PS3, PS4, PS5

How to set up a surround system

Setting up your surround sound speakers will involve correctly placing your speakers and fine-tuning the setting on the receiver/pre/pro to get a better and well-balanced sound.

A 5.1 surround speaker system consists of a center channel speaker, 2 front speakers (left and right), 2 surround speakers (left and right), and one or more subwoofers. This is the standard surround system for most home theaters and is easier to set up.

A 7.1 surround will consist of one center speaker, 2 front speakers (left and right), 2 surround speakers (left and right), 2 back surround speakers (left and right), and 1 or more subwoofers. When set up correctly, a 7.1 surround will help fill up the backspace, add depth, and provide you with incredible audio. However, if done incorrectly, a 7.1 system will sound muffled.

You should also keep in mind that setting up a 7.1 surround is not as easy as a 5.1 system. It is also worth noting that the .1 stands for the LFE channel and not the number of subs, but most manufacturers will use it to mean the number of subwoofers. You can have more than one sub in the .1 LFE channel.

Some owners add in-ceiling or height speakers to the surround system for a fuller object-based sound. If you decide to add 2 height speakers to the system it becomes 5.1.2 or 7.1.2, if you add 4 height speakers it becomes 5.1.4 or 7.1.4, and so on.

Speaker placement

Speaker placement will make a big difference in how the system sounds. Place everything properly and you get an incredible home theater sound experience but do the opposite and the speakers will not sound as good as they should.

You don’t want to spend money, time, and effort and get a bad sounding system due to the wrong placement.

1. Center channel speaker placement

The center channel is essential for every surround speaker set up. This channel is dedicated to the reproduction of vocals and dialogue whether is it in a song, movie, or game.

When choosing the right position for this speaker, we want to create the illusion of the dialogue coming from the display device (projector screen or Tv). To accomplish this, the channel speaker should be placed in the center of the TV or Projector relative to the listening position, below or above the display.

It is recommended that the speaker is placed horizontally below the display but this will depend on the position and height of the display device. Just make sure that the center speaker is at the ear level of your main listening position.

However, if you cannot position the center speaker below the display at ear level, you can place it above the display device at an angle facing the main listening position. This is because most of the signals coming from this channel will be more directional high frequencies.

2. Front speaker placement (left and right)

Both the 7.1 and 5.1 systems will have both the left and right front speakers.

The left and right front channel speakers handle most of the sound effects in your home theater but sometimes also reproduce some of the dialogue/conversations.

When positioning the left and right speakers, they should be placed at an angle facing the main listening area. The distance from the left and right speakers to the display should be equal. The distance of these speakers to the listening position should also be equal.

These front speakers should also be placed slightly in front of the center channel line, at the sides. The front speakers should form more of an isosceles triangle with the center of the listening position.

If you can imagine an isosceles triangle, the equal sides should angle between 22 to 30 degrees off-axis from the listening position to the left and right. The other side of the triangle will be the line behind which you will place your center channel speaker. The line from the center channel to the main listening position (the axis) will divide the triangle into two right-angled triangles.

The angle is just a guideline that you can follow to find where the speakers sound best by ear. You should also make sure that the tweeters of the speakers are at ear level when you are seated. Tweeters from tower speakers will easily be at ear level but bookshelf speakers will need stands for the same.

You can also “toe-in” the speakers to point to the listening position. Toe-in is where the speakers are angled inwards pointing towards the listener but the toe-in should be identical for both speakers for a great soundstage. This is will create a more focused and narrower soundstage.

3. Surround speakers (left and right)

Surround speakers help add depth to the sound system and fill up space around you.

For the left and right surround speakers, it is recommended to place the speakers with the tweeters at 1 or 2 ft above ear level, to 90° off the sides of the main listening position, or slightly behind the listening position at an angle of 110° to 120°.

To put this into perspective, if your couch/home theater seat is against the wall, you would put the speakers at 90° off your position to the left and right for a 5.1 surround. However, if you have space behind your seating position, you can place the speakers slightly behind at an angle of 110 to 120 degrees pointing towards the listening position for both 5.1 and 7.1 surrounds.

 Toe-in is also an option in this case.

4. Surround speakers (rear/back surround for a 7.1 system)

In the 7.1 surround speaker system, the rare surround speakers should be placed behind the listening position to add more depth. The back-surround speakers can be places at 135° to 150° off the axis. The tweeters should be 1 or 2 feet above the ear level.

5. Subwoofers (for the Low-Frequency Effects or LFE)

Subwoofers are designed to reproduce low-pitched frequencies/low-frequency effects lower than the speakers’ woofers are capable of generating.

Unlike the mids and the high, low bass frequencies are omnidirectional, meaning you can place the subwoofer anywhere provided it does not sound like a separate entity. However, you should avoid placing your sub near walls as this will make it sound muddy.

An active sub should also be placed close to the power source while a passive sub should be placed close to the receiver or amp. This will help minimize the length of cable that you will need to use.

What about Dipole and Bipole surround speakers?

In the surround speaker placement above I have mainly talked about “monopole speakers.”

Monopole speakers have front-facing, direct-radiating speaker drivers and these are the types of speakers most home theater owners are familiar with. The drivers in monopole speakers all face in the same direction. We have already looked at how you can best place monopole surround speakers for the best surround sound.

Bipole or dipole speakers have the cones mounted to the sides of the speaker cabinet. However, Bipole speakers work by pushing air outwards at the same time (are in phase) while in dipole speakers, one side of the speakers pulls air in and the other side pushes air outwards (out of phase).

When placing Bipole or dipole speakers, you will not have to worry about angling them. Bipole speakers can be mounted on the wall, 1 or 2 ft above the ear level in line with or slightly wider off-axis than the front left and right speakers. These speakers can also be placed at 90° to either side of the listening position. On the other hand, Dipole speakers should be placed at 90° off the axis and 1 or 2 feet above the ear level.

You have more placement flexibility with Bipole speakers than with dipole speakers.

Speaker placement guidelines and tips

  1. Minimize bare walls and floors for the best room acoustics.
  2. The speakers should have a clear path to the listening position to avoid blocking the sound waves.
  3. Avoid placing your speakers in corners, close to the floor, wall, or ceiling. These surfaces will reflect the sound waves creating stereo imaging, making the bass boomy and less clear.
  4. Put your room’s shape into consideration when you are doing speaker placement. Depending on the shape of your room you can experiment with different positions.

Home theater speaker calibration (crossover, level, and distance)

Trying to use the small receiver’s LCD display when calibrating will be a hassle. Therefore, I would recommend using the receiver’s on-screen instructions on your display device.

After connecting the receiver to the display, get familiar with the menu by looking at the user manual and pecking through the receiver’s menu. After this, you can get to the calibration.

Setting the speaker distance (speaker delay or distance)

Speaker distance or distance is the distance between the main listening position and to each speaker. Setting the speaker distance or delay is essential in making sure that the sound from each speaker reaches our ears at the same time.

  1. Use a tape measure to measure the distance between the speaker and the sweet spot (listening position) and note down the distance. Make sure that you measure the distance without altering the spot on your seating position where you take the measurements.
  2. After taking all the measurements, head on the to the receiver’s menu and locate the speaker distance/speaker delay settings.
  3. Enter the distance of each speaker on the menu, respectively for each speaker. The receiver will prompt you to set the distance for each speaker in increments to the nearest .5 or .1 feet.

Distance in inches/12= distance in feet.

Setting the speaker crossover

The Speaker crossover setting is the point or frequency where the speakers roll off and the subwoofer takes over with the bass notes and the low-frequency effects. The crossover settings for each speaker will depend on the ability of the speaker to produce bass.

Most manufacturers will provide you with the speaker’s frequency range, for example between 70 Hz to 20 Hz. In this case, the speaker can play low frequencies of up to 70 Hz. The general rule of thumb is to increase the cross over point by at least 10 Hz, so in our example, I would set the crossover frequency to at least 80 Hz.

Crossover frequencies are a broad topic that would be too much to cover in this guide. However, you can visit our guide to help you understand crossover frequencies better and how to set them.

Setting the speaker level

You will then need to set the level for each speaker as well as the sub by using a decibel meter (SPL meter) or by ear. I would recommend using a decibel meter that can be bought in local electronics stores, online or can be downloaded as an app. However, an app may not be as accurate as a dedicated SPL meter but will get the job done. Your receiver may also come with a calibration microphone.

Sit in your main listening position, turn the decibel meter on, set weighting to C, response to slow, and the dial at between 70 to 80 decibels.

Enable the test tone (white noise) on your receiver on the channel level menu setting to allow the receiver to send the tone to each speaker, speaker by speaker. Place the meter in front of your face pointing towards the ceiling at ear level. You can also place the SPL meter on a tripod at ear level.

Lower the master volume and make sure your room is as silent as possible.

Measure the output from each speaker and move the output level up or down. I would recommend a level of 75 decibels.

For the sub, I would set the level to match my taste but above the speakers’ level.

Once you are done setting the levels for each speaker, re-run the levels to ensure that each channel is even. Also, if you are having problems understanding the dialogue in movies, you can raise the level for the center channel by a few decibels higher than the rest of the speakers.

Finally

Once you are done with all the hard work and the sound is balanced, you can grab some popcorn, sit back, relax, and enjoy.

How to set up an AV receiver (Step by step)

How to set up a home theater receiver

AV receivers are the brains for most home theater systems. This is where most of the components are connected to allow for easy switching between devices.

A receiver also decodes and processes audio and video signals and powers speakers.

To set up an AV receiver here is what you need;

  • Find the right placement.
  • Connect the media devices to the receiver,
  • Connect the speakers and display device,
  • Calibrate the receiver.

It is also important to ensure you label all the cables that go to and from the receiver.

Receiver placement

After unpacking your AV receiver, here are some of the components that should be in the package;

  • A user’s guide.
  • Remote control.
  • The power cable.
  • A calibration microphone.

Once you are done unpacking, find the right spot to place the receiver. Before placing it there are several considerations you have to make.

Considerations for receiver placement

  • Heat– AV receivers generate heat during operation, most of which comes from the in-built amplifiers and transformers. You should therefore ensure that there is free airflow of air to aid in temperature regulation to prevent heat build-up. There should be at least 4 inches of space on each side and at least 6 inches to the back.
  • For a receiver with rear connections, connect all the cables before you slide your receiver into place but with ease of access to the rear connections.
  • If your receiver has an antenna for Wi-Fi and Bluetooth connections, leave enough space for them.

Receiver placement ideas

A receiver stand– A stand is a better option as it is open on all sides allowing for efficient heat dissipation.

Well-ventilated cabinet– The cabinet should have enough room and ventilation holes (should include a large opening on the side and the top for free airflow) to accommodate the receiver.

I would recommend purchasing a cabinet with cable management features such as internal gaps, holes, and rear-panel exit points for running the cables and speaker wires.

A component rack– Using a component rack will keep your media devices, receiver, power amps, and so on for a clean setup. In this case, you also need a remote-control system for the components. You can also use your smartphone to control your receiver if it’s connected to the network.

What about placing the receiver on the floor? Placing the receiver on the floor is a bad idea as it increases the chances of heat and dust buildup. However, there are cheaper DIY options such as;

  • A solid wood crate
  • Granite slab
  • A large piece of wood
  • Paving slab

Label speaker wires and cables

Label all your cables and wires at each end to keep track of where they run and for easier management. You can use store-bought labels or use masking tape.

Connect the Power cable

Depending on your receiver’s power rating, it may need more or less power.

I would recommend connecting your receiver to a power protection device (surge protector) to protect it from power surges, spikes, or brownouts. Do not connect your receiver’s power cord directly to the outlet.

Now let us get into the connections.

AV receiver connections

1.      Connecting display devices

How to connect a TV to a receiver

The following cables may be needed for a connection between your TV and receiver depending on the type of TV you have and the port selection on both components;

  • Coaxial, optical, and HDMI cables for digital connections
  • RCA cables for analog connections

After you figure out the cable type and length to use, you can proceed to the connections.

Most receivers will have an on-screen guide on how to set them up hence the need to connect your display device first.

If your TV has an HDMI input, connect it to the “Main” or HDMI output 1 on the receiver.

How to connect a receiver to a projector

The process of connecting your receiver to a projector is pretty much the same as a TV.

Examine the video outputs on the receiver and the inputs on the projector to know which cable to use then measure the distance between the receiver and the projector. This will help you choose the right cable length, usually HDMI for the video signals.

After buying the right cable, connect it to the corresponding jacks on the receiver and projector, turn the projector on, and play a test video to check if everything is in order.

2.      Connect ethernet and antennas

If your receiver comes with an antenna be it for AM, FM, Wi-Fi, or Bluetooth, you will need to connect it.

Some receivers may not come with in-built Wi-Fi but may have a LAN/Ethernet port to connect to your network.

3.      Connect the media devices

Media sources include options such as;

  • DVD player
  • Blu-ray player
  • Gaming console
  • Cable box/satellite box
  • Media server/Computer
  • VCR
  • Turntable

Some sources may require splitting the video and audio signals at the source. From the receiver, the video signals are sent to the display device, and the audio signal to the receiver for processing and amplification.

There are different cables that you can use for these connections depending on the port selection on your media devices.

For the image, you can use composite, component, and HDMI cables, and optical or coaxial cables are for audio. HDMI cables can be used for both video and audio signals.

How to connect a phone to a receiver

Connect your smartphone to your receiver using a 3.5 minijack cable (AUX), Bluetooth, or using an adapter such as a minijack to RCA adapter.

Some receivers support Apple Airplay to connect your iPhone or iPad.

Also, if your receiver has an MHL-compatible HDMI port and your smartphone is MHL compatible you can use an MHL to HDMI converter/adapter for the connection.

To know if your smartphone is MHL compatible, search for the manufacturer’s specs online or use an MHL checker app for android devices.

How to connect a turntable to a receiver

To connect your turntable to a receiver, use the phono input on the receiver using an RCA cable. Then attach a ground wire to signal GND to prevent noise or hum from the turntable from playing.

If the receiver does not have a phono preamp but the turntable does, you can simply plug in an audio cable into the receiver’s line-level inputs often labeled Analogue in, Line-in, AUX, and so on.

4.      Connect your Audio devices

How to connect a soundbar to a receiver

You can connect a passive soundbar to a receiver. Passive soundbars are better suited for a receiver but active soundbars are not meant to be used in this way unless you are using the preout outputs on the receiver.

Passive soundbars can either be stereo or multi-channel that can be connected to a receiver using speaker wires for each respective channel.

How to connect speakers to a receiver

The powered speaker outputs are located at the back of the receiver in most cases. These outputs will have well-labeled negative and positive terminals for each channel.

To connect the speaker wires, match the terminals on the receiver to the speaker input terminals. The center channel (C) to the center speaker, the right front speaker to the right front output (FR), the left front speaker to the front left output (FL), and so on.

Also, ensure you match polarity by matching the negative and positive connectors on each end of the receiver and the speakers.

For a system with DTS-X, Auro 3D, Dolby Atmos, or powered 2nd zone (zone 2), the user manual should have guidelines on which terminals/preouts to use.

How to connect a subwoofer to a receiver

For the LFE (low-frequency effects) channel, you will need a powered subwoofer. The output for this channel is labeled as LFE, Subwoofer, Sub out, or Subwoofer Preout. Using an LFE cable, you can connect the sub out to the LFE input on the sub.

Some subs also have line-level input and for this, you may need a Y RCA cable (For the LFE to line-level connection). Connect one end to the sub output on the receiver to the line-level inputs on the sub. This is because most receivers will not have line-level outputs for the sub hence the need for an LFE to the line-level converter (Y RCA).

For a passive sub, you may need an external sub amplifier to power the sub. From the sub output on the receiver, the signals can be transmitted to the amp for amplification and speaker wires can be used to send the powered signals to the inputs on the sub (spring clips).

However, there is a simple hack to use if you are on a limited budget, and buying an amp may not be an option for you. For this, use speaker wires and connect them to the FR and FL speaker outputs on the receiver to the R (right) and L (left) inputs on the sub.

But for this to work, the sub should also have an in-built crossover and speaker outputs for the FR and FL speakers to power those front speakers. (to correctly set up your crossover on your passive sub, visit the guide in the link)

This will strain your receiver since a sub is a larger load (requires more power) but it should work in the meantime. You will need a sub amp as time goes by as the sub will be underpowered with this kind of connection.

How to wire a Home theater AV receiver

Receiver settings

Video settings

Depending on the device with better video processing, you can choose whether the AVR or TV/Projector should do the processing.

To allow your TV/Projector to do the video processing set the AVR to “OFF” or “Passthrough”. This will allow the video signals to “pass-through” the receiver unaltered. You can then adjust the image settings on the display (sharpness, brightness, mode, etc).

Speaker settings

Here you will be presented with two options which are “small” and “large“. This has nothing to do with the physical size of your speakers but is essential for bass management.

Usually, you want to set the speakers to small which allows the low-frequency effects (Sub-bass) to be sent to an external sub-woofer that can either be active or passive (needs a sub amp). Your main speakers and receiver will thus be less strained for cleaner playback.

Setting the speakers to large will mean that the low frequencies are played back by both the sub and the speakers.

Speaker calibration

Today, most receivers are equipped with auto-calibration features to set the levels, set the speakers’ distances, and fine-tune the EQ. Auto-calibration is done using an SPL meter (calibration mic) that comes with the receiver or can be store-bought to time-align and balance the sound.

Once you fire up auto-calibration, you will be prompted to connect the mic. Simply plug it into the mic input and place it in your main seating position using a tripod stand. The receiver will then automatically send a test tone to each speaker and back to the receiver for calibration.

Other receivers may not come with a mic but may have a built-in test tone generator. You can then use an SPL meter to calibrate each speaker.

Here is what you need to know about the receiver’s auto-calibration;

  • The room should be completely silent to achieve the best results. If you have a soundproofed home theater room, you will have the upper hand but you can also close the doors and windows for utmost silence if you have not yet done soundproofing.
  • The results from the automatic calibration are not always 100% accurate. Therefore, once the automatic calibration is done check on the menu to confirm that the speaker channels and distance are correct. You can also use a test tone to confirm each speaker level manually.

Final take

AVRs are heavy and big devices that need to have enough space and ventilation for cooling the internal amp. You may need to connect most of the cables to the receiver before permanently sliding it into position.

When setting up your home theater receiver, follow the tips above, the user manual guidelines, and other resources such as YouTube videos and forums.