Recent Posts

Audio/Video system hum, buzz, and ground loop noises cause and fixes

Audio hum, buzz and ground loop noise

You can easily differentiate between humming and buzzing noise from your entertainment system. A hum is a softer noise that comes from your audio system usually for lower frequencies of about 60 Hz while a buzz is more of a piercing and irritating sound usually associated with higher 120 Hz frequencies.

There are several reasons that your speakers from either your TV, soundbar, headphones, or dedicated speakers may be making these buzzing or humming sounds;

  • Ground loops due to different electrical potential.
  • Interference between the power and speaker cables.
  • AC line noise.
  • Poor shielded and low-quality audio cables.
  • Faulty media devices/AV processor/amplifier.

Hum can also occur within other equipment in your home theater such as the receiver, preamp, or even amplifier and this is known as a mechanical hum. In other cases, the hum or buzz can also manifest on your display screen as moving wavy lines or diagonal bars.

The most important thing to do if you are facing this issue is to troubleshoot your system and find the root of the problem. Doing this will help you find an easy fix for the problem.

So, before we look at how you can fix a hum or buzz in your Audio/Visual system, let us look at some of the troubleshooting steps.

How to troubleshoot a hum or buzz in your home theater

1.      Turn your system’s volume down

If the buzz or hum goes down as you turn down the volume, your media sources/interconnects may be the problem but if the hum/buzz persists then the problem may be coming for your preamp/AV processor/amplifier or audio interconnects.

2.      Use different inputs on your pre/pro

Disconnect all of your source inputs from the receiver/preamp/integrated and try one input at a time. This will help find the possible root of the problem if it may be coming from your sources.

If the hum or buzz only happens when one of the sources is connected, you will need to disconnect it. You can also try using a different cable for that source and if the hum persists get that player checked out or replaced.

However, if the hum is persistent will all your sources, you can proceed with the troubleshooting.

3.      Disconnect your amplifier from all the sources

You will need to disconnect your amplifier from your pre/pro and leave the wires connected to the amplifier. Also, disconnect all the sources from the power plugs.

If you hear a humming or buzzing noise after doing this, then the problem may be the speaker wires or amplifier. Make sure that the speaker wires are not anywhere close to any power lines as this may cause interference of the audio signals.

If the hum goes away a ground loop may be causing the problem or the issue may be coming from the preamp or the interconnect between the pre/pro and the amplifier.

However, not everyone will be using separates. So, if you have an integrated amplifier/receiver and disconnecting the inputs eliminates the problem, then the ground loop may be the cause of the problem.

What is a ground loop?

Ground loop or earth loop is an electrical misconfiguration that occurs when 2 points in a circuit have different potentials forming a close conductive loop. This can cause hum, video, and audio interference and noise in your home theater system.

Ground loop hums are the most common in home theaters and media rooms where the hum is coming from the speakers. This can happen if, let’s say, you can have connected your preamp and amplifier in different AC sources that share a common path to the ground at different levels and this difference is manifested as a hum in your speakers or display device due to magnetic induction or in other words magnetic interference.

If you are using an analog TV, the interference can cause snow like effects on the TV and if you have a computer on the same circuit it may crash.

Ground loop hums typically occur at frequencies of 50 or 60 Hertz and can quickly be fixed by removing the ground connections of your devices but this will leave you with no protection from the electrical shock that is provided by the earth connection.

It is wrong to think that ground connections do not carry any current, but they do. In high power equipment like amplifiers, receivers and so on that share a common path to the ground the potential difference can be as high as 10 volts.

The problem is that tracking down a ground loop problem is not easy.

How to track down audio ground loop hum issues

Figuring out the cause of a ground loop hum will require troubleshooting by way of elimination.

  1. Find out where the hum or buzz is coming from by listening. Are your speakers being powered by a receiver or amplifier? If so, turn them off and disconnect all inputs from them, and then turn them on again. Make sure that your inputs are disconnected from their power sources and the power sources for those disconnected devices are turned off.

If the humming/buzzing persists after doing this, you may need to get in touch with the manufacturer or store you bought the receiver/integrated or receiver from as they problem may lie within that device. In some cases, the receiver or amplifier may work just fine in that store when it gets tested out, more on that later.

  • However, if doing this solves the hum problem and you are using separates for your system, you will need to disconnect the input sources from the processor or preamp that is feeding the amp. Turn your system back on and listen, is there hum?
  • If yes, try using a 3 prong to 2 prong AC plug (cheater plug) on the preamp, amp, or both, temporarily, to try and break out any ground loop interference. If the hum stops then a ground loop was the root of the problem. Please note that a cheater plug is only a temporary solution to help troubleshoot the problem. Cheater plugs are not safe and should not be used permanently. But if they solve the problem, they should be replaced with a better-quality ground loop lift like the HUM X. But if after disconnecting your inputs from the pre/pro and adding the ground lift, the hum persists, try using a different interconnect between the preamp and amp. If this does not solve it, you will need to get the pre/pro checked out.
  • If you are using an integrated amplifier/receiver and no harm is present on disconnecting the input sources or if in step 3 no hum is present for your separates system, plug in your inputs one by one and listen for the hum one after the other. One of your input sources may be the root of the hum.

How to find a ground loop hum issue for your display and video sources

If your display also has video hum;

  • Check your connection.
  • Try using different cables (well-shielded cables) to reduce the ground loop.
  • Change your video source.

The 3 of these may solve the problem.

In some instances, the sources for both video and audio may cause hum to your system. Once you determine the specific AV source causing the problem (VCR, Cable box, Satellite dish, and so on) by elimination like I mentioned earlier, try using a cheater plug to troubleshoot the ground loop but do not use it permanently. You may also need to use a matching transformer to isolate the cable connection.

So, for both audio and video hum, the elimination process is basically the same. Takedown the system and work your way from the speakers backward until the hum returns and isolate the problem or try seeing if using a cheater plug eliminates the problem. If the cheater plug does not work, try changing the cables before you begin thinking about returning the product or getting it check out.

How to prevent ground loop hums

The easiest way to stop ground loop hum and noises from happening is to prevent electrical ground loops for your system. You can do this by;

  • Use a single AC socket, connect a single surge protector or power strip to that socket then connect all your devices to that power strip or surge protector, if possible.
  • Using clip-on ferrite noise suppressors (ferrite beads) for your cables at the end of the cable that is close to the device. Ferrite beads are common in HDMI cables and laptop charging cords.
  • If your devices support the use of balanced cables, use balanced cables as your audio interconnects.
  • Ground lift your system by creating a break in the cable shield conductor.
  • Use isolation transformers (ground loop isolators/hum eliminators) for your cables to isolate the device being powered from the AC power source.
  • Use a technique known as single-point grounding where you interconnect all-metal chassis and ground them at one point using heavy conductors like copper.

What is a mechanical hum?

A mechanical hum or mechanically induced hum comes directly from within the equipment, for example, an integrated amplifier. With this hum/buzz, the noise comes directly from the device due to poorly designed DC on AC lines or transformers. However, in most cases, a mechanical hum will be caused by a faulty transformer.

Transformer hum/buzz is caused when the transformer is pulling too much current which causes the transformer’s laminations to vibrate/rattle in an effect commonly known as lamination rattle. The humming or buzzing can vary depending on the time of the day and can/will get worse as time passes without it being fixed.

In our example, the integrated amp, if the poor design if the DC on the AC line is the root of the mechanical hum, then this issue can easily be fixed by the manufacturer by removing the DC from the AC line. The manufacturers should also be able to fix a humming transformer on your expensive equipment by replacing it with a transformer that has a higher current rating.

Other possible causes of hum or buzz in your AV system

Use of poorly shielded or unshielded cables

To prevent reduce electrically induced hums, you should use well-shielded cables for your audio and video equipment which also includes the speaker wires.

These may be more expensive but they will prevent electromagnetic and radio frequency (RF) interference and electrical circuit noise which are also major causes of hum in most home theater systems.

Before you decide that a piece of certain equipment may be the root of the hum you are hearing in your home theater speakers, first figure out if the hum may cause by your AV interconnects or speaker wires before you take the equipment to get checked out or replaced.

AC line noise (dirty alternating current)

If all your devices, cables, interconnects seem to be working fine and you have eliminated ground loop from the equation, AC line noise (dirty AC) or simply line noise may be causing the issue. You can try testing out your equipment and interconnect from your friend’s house or someone close to you and if there is no hum, then, maybe you have a line noise problem.

Line noise refers to random electrical pulse fluctuations (spike or surges) in the alternating current of your house. This can come from either your dimmer switches, blender, fluorescent lights, power generator, hairdryer, or any other electrical device used in your home.

Line noise cannot only be manifested through hum but also through static on your display device and can corrupt files and programs on your computer.

Dirty AC not only causes hum in your home theater system but is potentially harmful even to you. It is important that if you suspect that line noise is the cause of the humming, get it checked out by an electrician to make sure that it is indeed the problem. But if you have the technical skills, you can test for line noise using a dirty power meter.

AC line noise can be fixed by using power line filters, UPS units, or power conditioners that can also get rid of the ground loop. You should also make sure that you choose all your electrical appliances wisely and try minimizing the usage of these appliances.

However, you should note that high-quality power conditioners and UPS units can get quite expensive.

My final thoughts

The above troubleshooting steps can help you find out what may be causing buzz or hum in your entertainment system. Don’t be quick to return your AV devices before you figure out the main root of the problem.

Sometimes all you may require to get rid of that annoying humming or buzzing noise is a simple fix such as connecting your equipment to a single power strip/surge protector or by using ferrite beads for your cables, wires, or interconnects.

After you fix the problem, you can now enjoy your expensive Audio and Video equipment.

About Height speakers (Dolby Atmos speakers explained)

Height speakers

For those unfamiliar with Dolby Atmos, it’s a popular object-based audio format that envelops a listening area with a spherical sound bubble for “atmospheric” immersion putting you right in the action.

Dolby Atmos soundtracks have 128 audio objects independent of traditional channels. The size and position of these objects in a 3D sound field are defined by spatial coordinates (metadata) allowing audio to pan the listening area on 3 axes, left/right, front/rear, and up/down.

Atmos uses height elements to add a vertical sense of space by placing sounds above you. In addition to conventional ear-level speakers, at least 2 height/in-ceiling/elevation speakers are required to reproduce overhead sound objects but 4 are recommended.

If you intend to build an Atmos system, we’ll go through how to best do it whether it’s from scratch or with an existing surround system.

Types of Atmos speakers

Atmos supports up to 34 channels (24-bed and 10 overhead channels). But it’s scalable and not limited by the number of speakers in your system. Thus, playback is supported by various speaker configurations (Stereo/surround).

For most individuals, only 5 or 7 ear-level speakers and a sub are attainable in a 5.1 or 7.1 setup respectively.

Height speakers are integral for optimal Atmos playback. Without them, you only get a faux horizontal 3D effect that should be convincing enough but not optimal.

Adding 2 height speakers to a 5.1 system will give you a 5.1.2 system. 5 denotes the core ear-level speakers, 1 is the sub while 2 is the number of height speakers. In this regard, 4-height speakers in a 7.1 system give you a 7.1.4 configuration.

The number and type of speakers will depend on your room’s layout and the size of the listening area. Wider listening areas require more speakers for uniform and adequate spatial coverage.

These overhead speakers can be;

  • Height speakers (on-ceiling/on-wall)
  • In-ceiling speakers.
  • Upward firing/Atmos-enabled/elevation speakers

Height speakers

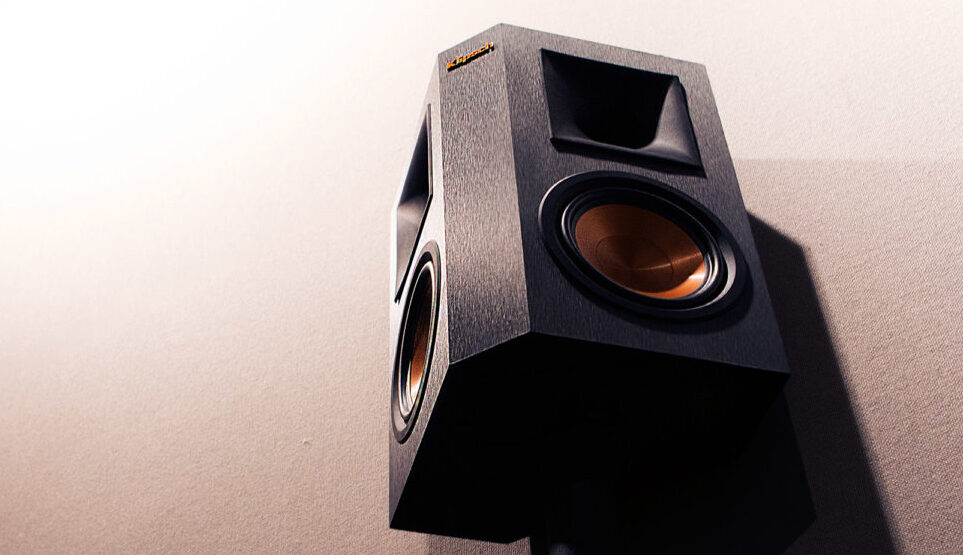
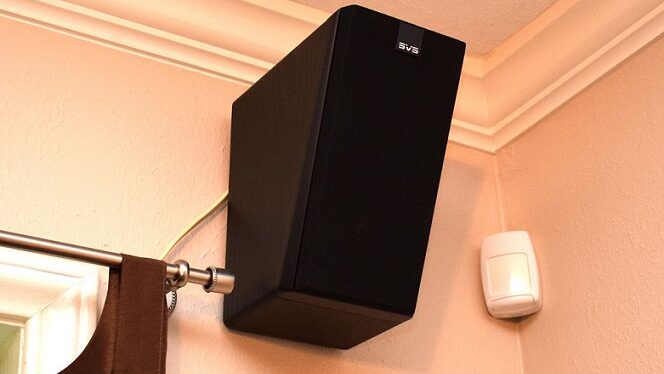
Height speakers are overhead speakers with smaller elevation angles that can be mounted on the wall or ceiling. They are ideal for playback of overhead objects in larger rooms.

Most height speakers are 2-way with a mid-range woofer and a high-frequency tweeter essential for the accurate localization of objects in a 3D sound bubble. Usually, these drivers give the speakers an effective frequency range of about 200 Hz to 20 kHz.

You can use a new or repurposed bookshelf, globe, or thin-style speakers with pre-angled front baffles that can be mounted as front, rear or side height speakers.

Height speaker
Height speaker

In-ceiling speakers

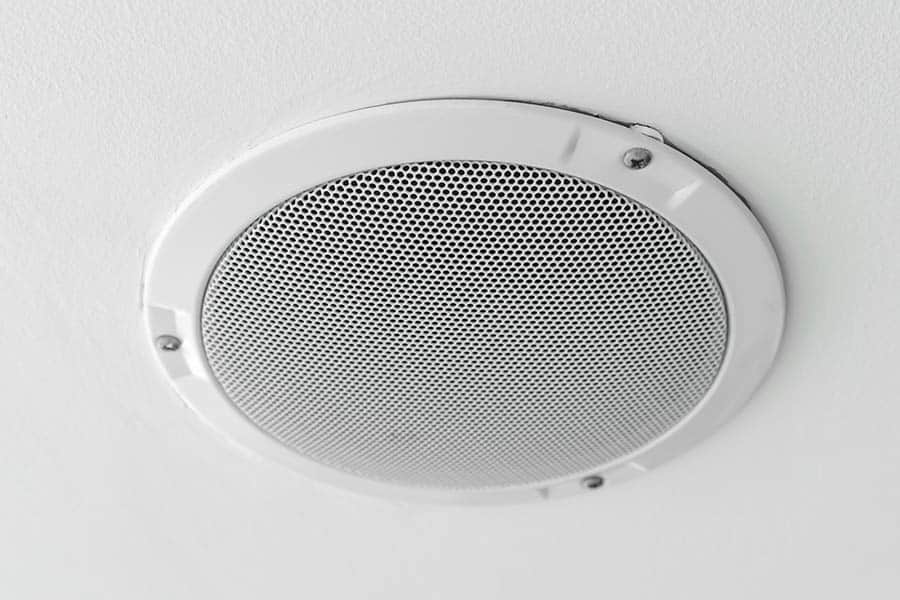
Usually, in-ceiling speakers are 2-way coaxial designs with the woofer and tweeter mounted on the same axis to cover the entire audio range. They are different from height speakers where the drivers are component split (different axes).

In-ceiling speakers are best suited for high ceilings as they are relatively easy to localize on low ceilings.

These speakers should be flush mounted to the ceiling facing downwards which involves making holes in the ceiling for installation and cabling.

For even spatial cover from left to right and front to back, in-ceiling speakers have a wide dispersion pattern. Some may be pre-angled to radiate sound to the listening area.

Conversely, you will need at least 2 in-ceiling speakers but for optimal performance use 4 speakers. Larger listening areas require more speakers.

If you use in-ceiling speakers for your main listening needs, repurpose them for height effects and get bed channel speakers to replace them.

In-Ceiling-Speaker
In-Ceiling-Speaker

Atmos-enabled speakers/modules

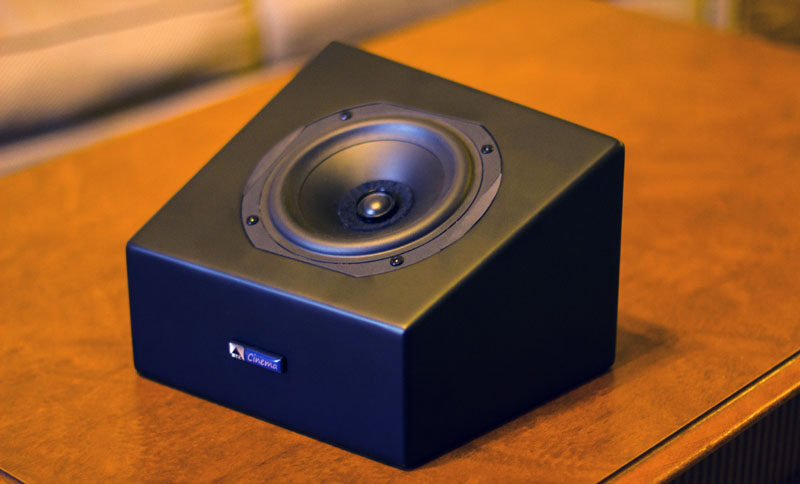
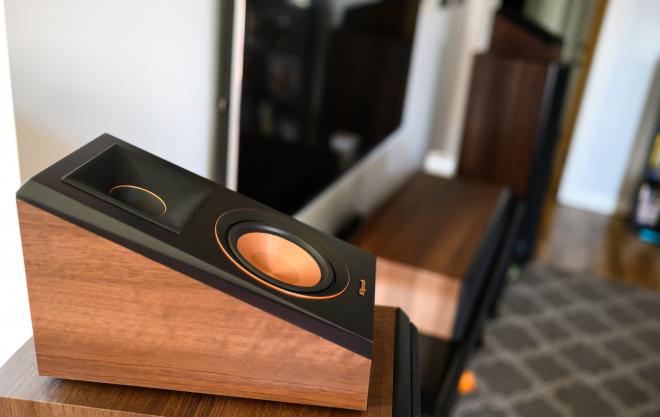
If wall or ceiling installation isn’t an option, Atmos-enabled or elevation speakers are a convenient and cost-effective alternative for creating a virtual sound bubble (illusion of height).

Atmos-enabled speakers reflect sound to the listening area using an up-firing driver pointed to the ceiling at an angle of ~20°.

These speakers can be placed on your main front and/or rear channel bookshelf/floor-standing speakers slightly above ear level to prevent direct radiation to the listening area. Meanwhile, some are integrated into floor standing or bookshelf speakers with 2 sets of speaker connections (binding posts) for the direct-firing and elevation drivers.

These speakers’ performance depends on their placement, ceiling material, and ceiling height as rooms differ in shape and acoustic properties. Up-firing speakers perform best on low, flat, and reflective ceilings made of materials such as concrete, sheetrock, drywall, or wood.

The ceiling should be 8 to 10 ft high. This is because the overhead sounds degrade/diffuse with increased distance to the ceiling. Additionally, vaulted or acoustically absorbent ceilings are sub-optimal for up-firing speakers.

Adding hard and non-absorptive materials such as foam boards on the ceiling’s reflection points can improve immersion.

Adjusting the vertical reflection angle depending on placement height can also improve performance.

Atmos enabled speaker
Atmos-enabled speaker

Buying height speakers for home

All speakers in an Atmos setup should be added in pairs as Dolby recommends.

Overhead speakers should complement the tonal performance, frequency response, output, and power handling capabilities of the ear-level speakers. This ensures there is no disconnect between the listener level and overhead sound for uniform spatial resolution in the listening area.

So, here’s what to look for when buying height speakers;

Sound quality

Although sound quality is subjective, the speakers in your Atmos system should be sonically balanced.

Timbre match (tonally match) the height effect speakers as closely as possible to your main speakers. The same goes for all speakers with exception of the sub which doesn’t playback localizable audio.

With this, audio objects can pan the sound field smoothly and seamlessly regardless of their position. Mismatched speakers don’t provide consistent transitions and will feel detached.

Using the same family of speakers (same brand and series) will yield the best results. These speakers have similar crossovers and drivers which contribute to a speaker’s tonal performance. Additionally, different speaker lines of the same brand may not be sonically identical.

However, this rule is not carved in stone. Feel free to experiment with different speakers to get a feel of what works best for you.

SPL output (loudness)

The maximum SPL output (SPLmax) denoted as dB (decibels) specifies a speaker’s perceived loudness. SPL is affected by variables such as the speaker’s capabilities, other speakers in the room, amplification, and the room itself.

Speakers with similar output level capabilities above the crossover points preserve dynamic range across the entire listening area for precise placement and scaling of audio objects. The same is true of overhead speakers.

Usually, manufacturers provide details on maximum continuous output but the sensitivity rating can also be used to estimate a speaker’s loudness when supplied with 1 watt of power at one meter.

As most speakers are passive (amplified externally by an AVR or amp), pay attention to the ohm rating to ensure the amp can handle the load.

Further fine-tuning of the height speaker levels is done during calibration.

Frequency response

Atmos tracks cover the entire audible frequency range. But height speakers should be full range down to 150 Hz or so.

Below this, bass frequencies which are omnidirectional and not localizable, are reproduced by your main speakers and sub. Localization is a function of the higher frequencies as heard by the listener.

The ideal frequency response for overhead speakers would be 100 Hz to 18 kHz, ±3 dB (flat response within +/-3dB between 100 Hz and 16 kHz.

Number of speakers

The number of overhead speakers in your room is a function of the listening area dimensions (horizontal length and width). If possible, the number of overhead speakers should match the number of side surround speakers to maintain the sound image.

One pair of speakers should be adequate for Atmos, but 4 are ideal (2 fronts and 2 rears). You don’t lose height effect information with 2 speakers.

You can add an extra set of height speakers if 2 pairs are not adequate for a large listening area for a total of 6 speakers.

Simply put, adapt the number of speakers to the size of your listening area.

Dispersion pattern

Dispersion/coverage pattern describes how sound is spread out by a speaker both horizontally and vertically.

Think of a speaker’s cone as a unidirectional sound source that expands outwards from the speaker. When facing the speaker’s acoustic center on-axis, the sound will beam to you at the highest SPL. As you move off-axis, the sound intensity decreases, and the tonal characteristics change.

Atmos speakers with a wide dispersion pattern are preferred for uniform coverage, especially for a wide listening area. 

The dispersion limits are often specced as a -6dB drop off-axis based on a single frequency test tone. An example of a wide dispersion spec is 90° x 60° (horizontal x vertical) @ 1 kHz. In this case, the SPL drops by 3 dB at 45° on the horizontal axis and 30° on the vertical axis.

The overhead speaker should have a coverage angle of at least 50° or 3 dB down @ 25° off-axis.

Budget

There is an assortment of height speakers at different price options to choose from depending on your budget. There are cheap, mid-range, and high-end options depending on the build quality with compromises being made for cheaper products.

On average, a decent pair of Atmos speakers cost around $500. Some can go as low as $100 or as high as $1000+ per pair.

For great performance buy, mid-range or high-end speakers. Avoid fancy speakers if the cost can’t justify the gains.

Dipole vs Bi-pole speakers for Atmos

Most height speakers are direct radiating (monopole speakers) that are aimed at the listening area. Monopole speakers are ideal for larger theater rooms (over 5000m3).

On the flip side, focused overhead audio can be distracting in a smaller room. Here, you can opt for dipole (bi-directional out of phase) or bipole (bi-directional in phase) speakers to diffuse the sound for uniform SPL coverage.

Bipole speakers are omnidirectional with 2 driver arrays pointed in opposite directions but wired in phase. They also spread the sound information into the listening area and are great as Atmos speakers for smaller rooms with lower ceilings.

Meanwhile, dipole speakers have 2 driver arrays wired out of phase but are unsuitable for Atmos playback as they don’t provide uniform coverage. They have a null zone (cancellation zone) which does not support localization. At the null zone, the sound pressure level (SPL) drops by a significant 8 to 10 decibels due to interference.

Dolby Atmos speaker placement

Speaker placement has the biggest impact on Atmos’ performance and should be optimized for accurate playback as intended by the mixer.

Let’s face it, some rooms are better suited for Atmos than others. Your room may neither be ideal nor proportional thus, you should adapt speaker placement to the room’s proportions.

The guidelines provided by Dolby for Atmos placement are intended for a single seating position and may not be practical if you have multiple seats or for practical reasons such as doors, windows and fire pits and so on that may inhibit optimal placement.

With this in mind, I will explain how to adapt placement to your specific needs.

General placement guidelines;

  • Don’t be close to any of the speakers which can make it a louder dominant source and shift the soundstage.
  • The seating area should be evenly covered by the speakers for the tonal balance of objects as they move in the sound field.
  • If possible, all the speakers should be aimed at the seating area.
  • The speaker’s placement position should not conflict with its suggested direction. Rear speakers should not be perceived in the front nor should right speakers be perceived to the left.
  • During placement, don’t ignore the entire listening area’s shape (area containing the listeners’ heads). Have a clear line of sight from all speakers to all listening positions.
  • For adequate angular separation think of placement in terms of angles.

Before mounting/placing the height effects speakers, ensure the base-level speakers are well placed.

Front speakers

The front speakers (LCR) are used as the reference point for the placement of surround and height speakers.

Place the center channel speaker (C) on your screen’s centerline (center front reference). The center front reference is an imaginary line in the middle of your screen and cuts through the main listening position.

The front left and right speakers (LR) should be as close as possible to the screen edges.

Additionally, the horizontal audio angle for the front left and right channels (LR) to the MLP should match the viewing angle to achieve audio/visual coherence. Simply place the speakers as close as possible to your screen’s edges. The audio angle can be wider but not overly so.

The front left and right channels should be equidistant to the MLP at an angle of 22° to 30° off the center front reference.

Surround speakers

For a wider soundstage, surrounds are added to the sides and behind the listening area with adequate spatial separation between the front and surround speakers.

Point your surround speakers inwards on the same horizontal plane as your front speakers for good coverage in the seating area. The listening plane can be tilted to the front of the surround speakers are elevated in raised multi-row home theaters or for practical reasons. You should be able to draw a line from your screen’s acoustic center to the rear surrounds.

Pairs of surround speakers (e.g., L & R rear surrounds) should be at a uniform height at or slightly above ear level.

Put the surrounds as low as possible with a clear line of sight for all listeners. This reduces auditory occlusion which can affect tonal balance and localization while maintaining separation with the overhead channels.

When raised above ear level, surround speakers should be no more than 1.2x the height of the main speakers from the floor so the audio is not significantly above the head. For most individuals, this will be about 1 ft (30cm) of elevation per riser in a multi-row environment.

Side surround speakers should be placed at approximately 90° to 120° off center depending on your configuration while the rear surrounds should be at 130 to 150° off-center in a 7.1 system. The angle between 2 adjacent surrounds should not exceed 60°.

Overhead speaker placement

The placement of overhead speakers should create a spherical sound bubble that envelops all listeners. For 4-height speakers, this is achieved by centering them to the listening area left to right and front to back. Front height effects should not be perceived in the rear or vice versa.

For 2-height channels, mount them in front of the center aperture formed by the surround speakers but angle them to the listening area.

To get adequate coverage, mount speakers with a narrower dispersion (under 90°) angled to the listening area. Point speakers with a wider coverage (over 90°) downwards.

I would suggest using a pan and tilt mount to aim non-angled height speakers to the listening area. The front-to-back and left-to-right angular spacing from the MLP should not exceed 90°. For more than 2 pairs of ceiling speakers, the angle between 2 adjacent speakers should not exceed 90° from the MLP.

Place the height speakers at a height 2-3 times the ear-level height for up/down angular separation while maintaining a coherent 3D soundstage.

If the base-channel speakers are elevated, overhead speakers’ placement should change to achieve adequate vertical separation. The optimal vertical angular separation of height channels from ear level is about 45°. This can be adjusted between 30° and 55° but shouldn’t exceed 60°.

For low ceilings, mount height speakers as high as possible on the wall or ceiling.

Dolby Atmos calibration

The audio from each loudspeaker should reach the listener without phase, level, or delay differences.

All ear-level speakers should be equidistant to the listener’s position for matched speaker levels and even spatial audio. If this is not possible, use distance compensation to time-align arrivals of sound to the listener. Level matching can be done manually or using auto-calibration.

You need an SPL meter set to c-weighting (how our ears perceive sound). All speakers should read 75 dB at the main listening position (75 dB is the THX reference level for home theaters). This reference level can be pretty loud and can peak at 105 dB and should not be exceeded by much.

Using a tripod stand, place the meter at the MLP at ear level with the microphone pointed up. Set the master volume to 0dB (relative volume scale) and navigate the settings to find a tone generator that outputs pink noise to each of your speakers.

The receiver will automatically compensate for any time delay. Do further fine-tuning by ear.

You can also manually adjust the level until the SPL meter reads 75 dB for each speaker including the height speakers.

Consequently, bass management (crossover point) should correspond to the overhead speakers’ low-frequency extension. This is usually set to between 120 Hz and 150 Hz.

To sum up

Atmos and other 3D sound formats such as DTS-X and Auro 3D have made truly immersive audio a reality.

While setting up an Atmos system may seem daunting at first, consider and adapt to your room’s layout and size for the best results.

All in all, the way you build your system comes down to preference in aesthetics, set up, and future-proofing.

I hope you found this guide helpful but feel free to tinker around to see what works best for you then put more butter on that popcorn.

3 Alternatives to Wall mounting a Tv (Mount without drilling)

Mount a TV

Getting your first Tv or upgrading your current one is a very exciting experience. But with every Tv, comes the need to place it. Usually, most users will opt for wall mounting their TVs, a process that involves drilling.

However, if you wish to mount your TV without drilling or damaging your wall, you will have limited options.

There are 3 main alternatives to wall mounting a TV;

  • Using a Hybrid TV stand
  • Ceiling mounting the TV
  • Using strong adhesive mounts

For most people, the only viable option would be using a hybrid TV stand (tabletop or floor standing). The remaining 2 options could spell doom for your TV and are not recommended in most cases.

1.      Hybrid TV stand

A hybrid TV stand is the best alternative to wall mounting a Tv but you should ensure you choose the right one for your TV.

Usually, hybrid TV stands usually come with an integrated mount for the TV and a cabinet that you can use to place other AV components such as a streamer, a Blu-ray player, a receiver, and so on. These are known as tabletop stands. This type of hybrid stand will be suitable for most media rooms.

Floor standing stands have no cabinet and only have a base and a Tv mount for a cleaner aesthetic.

When choosing a hybrid stand, you should first consider the size and weight of the TV. Check what the stand is rated for before purchasing. Usually, most hybrid stands will be suitable for TVs that are 65″ or less.

The stand should have the right height to ensure that the Tv is within eye level from your sitting position. You could get a stand that is height-adjustable for more flexibility depending on your preference.

If the stand has a bottom console (tabletop), ensure that it is a few inches wider than the TV for a cleaner look.

A movable hybrid stand (mobile/mount rolling TV stand) can also be a great option if you want the flexibility to move your Tv from one position to another.

Getting the wrong stand could pose a significant risk to your Tv investment and safety.

I would also recommend buying a stand with cable management channels for a cleaner and more appealing setup. You could match the stand’s color to your by either buying a stand that matches the wall color or by spray painting the stand.

2.      Strong adhesive TV mounts

Adhesive TV mounts can be a huge risk and could significantly shorten your TV’s lifespan, especially for TVs larger than 32″.

But if this is a risk you are willing to take, you should at least ensure that you increase your chances of success. You should first check how much weight the adhesive can hold and compare that to your TV’s weight.

The wall should also be as clean as possible before applying the adhesive.

However, you should note no matter how strong the adhesive is, it is still a huge risk. Also, removing the adhesive mount could be frustrating and could damage your wall’s paint.

3.      Adjustable ceiling mount bracket

This last method will actually involve some drilling or hammering for installation and will not be a great alternative to wall mounting.

First, check the mount’s weight specification before purchasing. This ceiling mount should also be adjustable for tweaking the height and viewing angle.

Here is how to install a ceiling TV mount;

  1. Determine where the ceiling joists are (use a stud finder) to attach the mount. Ensure there are no water pipes, electrical lines or anything that can get damaged. If the ceiling is made of concrete, this should not be a problem.
  2. Mark the drilling points using the mount plate holes as your guide. The plate may have 2 holes for a concrete ceiling (smaller holes) and 2 for wooden joists (slightly wider).
  3. Drill pilot holes on the ceiling. For a wooden ceiling make sure that you drill on the joists.
  4. Install the mounting plate and screw it in to ensure it’s nice and tight.
  5. Put the mounting collar in the plate and line up the holes and slide in the pole making sure that you line up the holes.
  6. Bolt the mounting pole to the plate and make it tight before putting the decorative dish on, if there is one.
  7. Add the final adjustable pole in. You may need to fish your TV cables through the pole from the ceiling if you have a wooden ceiling before installing the adjustable pole.
  8. Bolt the pole in and tighten it using washers and nuts. You can adjust the pole before bolting depending on how high you want your TV to be.
  9. Assemble the TV mount swivel head and mount it to the back of the TV (use the instructions manual).
  10. Finally, get someone to help you lift the TV, add the bolts, washers, and nuts to tighten the swivel head to the mounting pole.

Your ceiling mount may be slightly different, so, remember to follow the user manual.

My final thoughts

Mounting your TV to a concrete or brick wall without drilling is complicated. In most cases, you are better off drilling the wall for you to mount the TV but if you live in a rented space ensure you are allowed to do it.

The other best alternative to this is using a hybrid stand. In my opinion, this is the only way to mount a TV without damaging the wall. I would highly recommend you use this method over the rest.

For adhesives, I do not believe that they can be strong enough to hold a heavy TV (32 inches or above). However, if your TV is lighter, this can be a great option but more difficult to remove.

The final option will involve some drilling which defeats the purpose of not drilling in the first place.

DAC for a home theater (Digital to analog converter) guide

Home theater DAC

A DAC or Digital to analog converter is an electrical device that converts digital audio signals (0s and 1s) to analog signals. Digital to analog converters can be found in phones, laptops, receivers, audio/video processors/preamps to help smooth out the audio for the listener.

Although they can be built-in in some devices like the ones mentioned above, this may not always be the case for all the devices and in this case, you may need an external DAC.

You may not always need an external DAC but having one could definitely improve your home theater listening experience. This is because it bypasses the inferior audio decoding in your devices be it a stereo amp, a computer, and so on, and adds extra details to the stereo sound which digital sound lacks.

How does a Digital to Analogue Converter work?

Digital audio signals are not similar to analog signals. Let me explain.

When we go to a live music performance event, the sound that we hear from the artists is analog. Analog sound is continuous with no interruptions which are different from digital sound signals that are represented by values namely: 1s and 0s.

Therefore, when you look at the wavelength (amplitude against time) of an analog signal you will quickly realize that it is a continuous sine wave but a digital sound wavelength is denoted by square waves.

What a DAC does is convert the square waves to continuous sine waves that humans can comprehend or hear through preset codes. The DAC converts the bits of 1s and 0s to an analog electrical signal which is then amplified and can then be played by your headphones or stereo speakers.

It is impossible for humans to comprehend digital sound signals as no sound is produced. That is why all devices need to have a DAC, either built-in or external for you to hear the sound.

If you decide to add an external DAC to any of your devices, the internal sound processing of that device is bypassed and this can have a significant positive impact on the sound clarity. However, if you are not an audio nut, adding an external DAC may not be of much use to you.

Types of External DACs

1.      Component High Fidelity DAC (Hi-Fi DAC)

Component Hi-Fi DACs are mainly used in dedicated stereo home theaters by avid music listeners. These DACs are designed to have advanced circuitry, large power supplies, built-in CD players, and wireless connectivity options such as Wi-Fi and Bluetooth.

If you have a Hi-Fi DAC, you may not need a receiver or preamp for your stereo music system as you can connect directly to your amplifier.

2.      USB DAC

A USB digital to analog converter is compact and portable and can be used with your phone or laptop to connect to your headphones or stereo speakers.

These DACs mainly have a similar size to that of a flash drive and mostly get their power from the device it is connected or may have internal batteries.

If you are using a smartphone or tablet (either android or IOS), you may require either micro-USB to USB-A, lightning to USB-A, or USB-C to USB-A adapter to connect the portable USB DAC.

3.      Headphone DAC/Amplifier

A headphone AMP/DAC is simply a Digital to Analogue converter with an internal amplifier. An Amp and DAC combo can be a great addition if you want the best sound out of your headphones.

4.      Desktop USB DAC

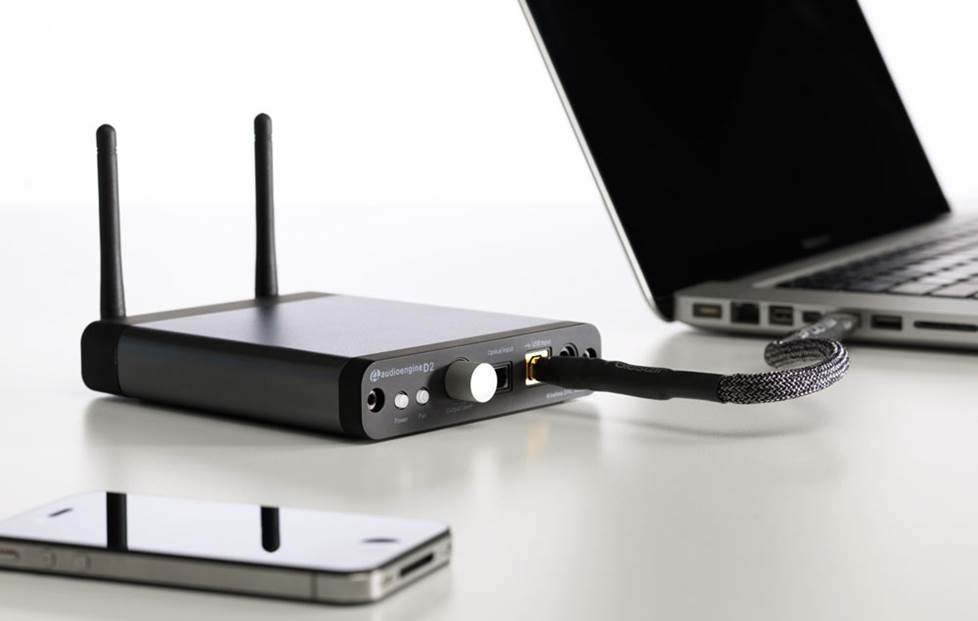
A Desktop USB DAC is similar to the portable USB DAC in that it connects to your computer’s USB port but is not portable. This type of DAC may require an external power source and has output ports where you can connect to an amplifier or speakers with built-in amps (powered speakers).

You can also connect your audio sources and music streaming devices to your DAC.

5.      Wireless DAC

With a wireless DAC, you do not need cables to connect to your wireless headphones or powered speakers. Some may only need a cable to connect to the media source but some may also work completely wirelessly using Bluetooth, Airplay, the Wi-Fi network, and so on.

Some of the devices with built-in DACs

  • Smartphones
  • Tablets
  • Laptops
  • Preamps
  • AV receivers
  • Integrated amps

Although the built-in DACs will work just fine, if you are an audiophile, you will quickly notice the difference between not having and having an external one. This is because most DACs in these devices will not be of the highest quality as they are other components that are squeezed into them.

Here is when having an external can be a great addition to improve the sound from your headphones or stereo system. This can help reduce some possible problems like limited bitrate, jitter, aliasing, and a narrow dynamic range that is associated with built in DACs.

Common DAC problems jargon

  • Jitter is time distortion that may occur in your audio playback that may occur when the digital signals are converted to analog signals. It occurs when the DAC’s sampler does not work as well as it should mainly affecting the high frequencies. This should not be a problem for an average home theater user but to an audiophile, this is a big disadvantage.
  • Aliasing occurs when the analog signal is distorted to become indistinguishable from the digital signal it was sampled from. This occurs when the DAC has a low sampling rate.
  • Narrow dynamic range occurs when the quietest and loudest parts of the converted analog soundwave are narrow.
  • Limited bitrate occurs when the sound produced after conversion has less bandwidth which lowers the quality of sound that is produced. This occurs because the DAC device has a low decoding speed meaning that lesser audio information will be converted from the digital to the analog sound waves.

A DAC with some of these issues will not mean that the music you hear from your stereo system or headphones will be crappy but the quality will be lowered and easily notable to audiophiles.

How to connect a DAC to a computer

  1. Plug in the DAC to the computer’s USB port.
  2. Connect the DAC to a power amplifier using an RCA cable or any other analog audio cable.
  3. Hook up the amplifier to your stereo speakers.
  4. Play a music file that you love to test the performance of the DAC.

If you are using powered speakers or headphones with a built-in amplifier, you can connect the DAC directly to them without needing another power amplifier.

How to connect a DAC to a smartphone or tablet (Android or IOS)

You will need a USB audio adapter for your phone to this type of connection. This can be a;

  • Lightning to USB-A adapter.
  • USB Type C to USB-A adapter.
  • Micro USB to USB-A adapter.

Connect the audio adapter to the phone’s or tablet’s charging port. Hook up the DAC to the adapter’s USB port then plug in your headphones to the DAC.

If you are using a DAC that requires external power (non-portable DAC), the process will be the same but you can also connect the DAC to an amplifier that can then power your home theater’s stereo speakers.

How to connect your DAC to a TV

You may mainly need to connect a DAC to your TV if you are streaming music directly from the TV. This will be common for those that are using smart TVs.

The TV will need to have a digital output (S/PDIF) to connect to the DAC after which the converted signals will be fed to your amplifier or powered speakers/headphones.

How to connect a DAC to an AV receiver or integrated AMP

To connect a DAC to a receiver or integrated amp, your receiver/integrated should have a bypass input. The stereo source can then be fed through the DAC after which the internal audio processor on the integrated amp or receiver will be bypassed directly to the internal amplifier to power the speakers. In this case, the flow will be as follows, Audio sourceàDACàBypass inputàBuilt-in amplifieràSpeakers/headphones.

If your receiver or integrated amplifier does not have a bypass input it should have a digital audio output(S/PDIF). The DAC can then be connected to the digital output using an adapter (aux to USB).  Analog signals from the DAC can then be fed to powered speakers/headphones or to an amplifier and then to passive speakers. In this case, the audio sources can be fed to your receiver/integrated. Audio sourceàReceiver/integrated amplifieràDigital outàDACàpower amplifier/headphones/powered speakers.

However, you should note that the bypass or digital audio-out features are mostly found in high-end receivers and integrated amplifiers so, this may not work for everyone.

How to get the most out of your DAC setup

  1. Have good digital music sources so that the DAC can have a good amount of detail from the digital signals, to begin with. This will mean using high-quality music CDs/records, streaming services such as YouTube music premium, Spotify, Amazon Music HD, Prime phonic, Qobuz, Apple music, and so on.
  2. Use high-quality speakers/headphones that can output high-quality sound.
  3. If you are using a computer as a source, you may need to tweak the audio settings on the computer for the best sound. You may also need to download USB drivers to the computer for operation.
  4. Use high-quality audio cables.

Is getting an external DAC worth it?

Getting a DAC will be worth it if you want to improve your system’s audio, especially if you are using your computer to play music. Computer soundcards can have a lot of interference which can lead to a loss in sound quality. DACs are also worth it if you listen to a lot of music directly from your smartphone/Tablet.

In general, if you are very keen on setting up’s sound output and want to get all the aspects of a high-quality stereo set upright, a DAC will be a great addition.

But as I mentioned earlier this is not a requirement and depending on your listening preference you can choose to invest in this device or not.

How to connect an integrated amplifier to an AV receiver

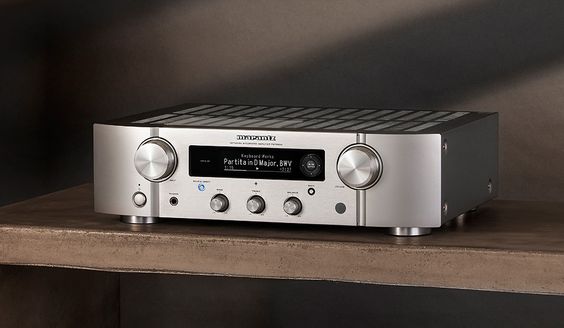
Integrated amplifier

Having an additional integrated amplifier to your AV receiver can be great if you want to drive more power to the speaker, especially the front speakers.

This can also help you expand your home theater surround system.

So here is a step by step process on how you can add an external amplifier to your system;

1.      Locate the AV receiver’s pre-outs

Pre outs on an AV receiver are used to add external amplifiers to add more power to the home theater/media room speakers. The audio signals, therefore, pass through the receiver without amplification to an external amp.

They are commonly found in most high-end and some mid-range receivers. Different receivers will have the preouts in different locations at the back of the receiver.

Here are some of the common preouts and their uses;

  • Sub-woofer preouts– Mainly used to send low-frequency signals to the subwoofers for better bass. The sub preout is mainly connected directly to an active sub(s) without the need for an external amplifier. Your receiver may have 1,2 or more outputs for the subwoofer preout section but there is only one LFE channel.
  • Front left (FL) and right preouts (FR) or (front)– Are mainly used to send signals for the left and right channels to the amp for more power (better soundstage). These are the receiver preouts that are used in most scenarios.
  • Center preouts (C)– Send signals for the center channel to an external amp for more power to the center channel.
  • Surround preouts or surround (SR and SL) and surround back (SBR and SBL)– Can be used to send surround signals to an external amp if you want more power for the surround speakers.
  • Zone 2 and zone 3 preouts (multi-zone)– Allow you to connect to an external amplifier to send sound signals to a different room(s).

You can locate these preouts at the back of your receiver for the various channels. Some receiver may also color code the left and right channels differently but the white color code is mainly used for the left channels and red for the white channels (check your user manual for more info).

2.      Connect your RCA cables to the receiver preouts

Depending on the channels you want to drive more power to, you can connect the channel to the respective inputs (line-level inputs) on the external amplifier using RCA cables.

For example, if you are only using the external amplifier for the front soundstage, you will only need to connect the FR, FR, and C channel preouts to the respective inputs on the amp. This will ensure that you have a soundstage with a superior sound.

You can also connect the left and right channel preouts to the bypass inputs on the integrated amp for uncompressed stereo sound. This will only be useful if the integrated amp has a bypass input.

3.      Connect the speakers to the external integrated amp

You can now connect your speakers to the integrated amp for the respective channels making sure that you match the polarity between your amp and speakers. Then go to your system and balance the sound for the various channels.

Do you need to add an external amp to a receiver?

The answer will depend on the following;

  • How loud you listen to your speakers.
  • Your speakers load impedance.
  • How big or small your home theater room is.
  • Bass management.

The table below should help you make a better decision

Factors Low Mid High
How loud you listen 60 to 70 decibels 75-85 decibels More than 85 decibels
Speaker load impedance 8 ohms > 90 decibels 8 ohms < 90 decibels 4 ohms < 90 decibels
Your room’s size Less than 1500ft³ 1500 to 3000ft³ More than 3000ft³
Bass management Using a dedicated sub Full range bass on speakers  
Verdict Do not add an external amp You can use your receiver alone or add an external amp Add an external amplifier

What are the pros and cons of using a receiver’s preouts to add an external integrated amp?

Pros

  • Improves your ability to expand your surround sound system. You can reroute the unused receiver outputs to power other speakers like the height speakers for Dolby Atmos and height modes or to another room (zone). The connection possibilities are endless and you can customize your setup according to your preference.
  • Reduces the strain on your AV receiver which improves its efficiency as it powers fewer channels.
  • Improved sound quality for your home theater system by improving the sonic character of the room.

Cons

  • Powering more amplifiers will means that your system consumes more power which drives up the power cost.
  • AV receivers with preouts are more expensive than those without preouts.
  • Additional cables can make cable management more confusing.
  • Possible sonic inconsistencies due to the use of different amps for the different speaker channels. This should not be an issue for an average home theater user but to an audiophile, it will.

How can I connect an amplifier to a receiver without preouts?

If your Receiver does not have preouts, you can use a speaker to RCA line-level converter that is mostly used for car audio. A speaker line-level converter converts a speaker output to an RCA pre output signal.

Therefore, to connect an integrated amplifier to a receiver without preouts you would hook up the converter to the receiver’s speaker output for the channels you want to add more power to then hook up the converter’s RCA cables to the external amplifier. The wires are color-coded to use a guide as to where you can plug in everything and this is usually white/black for the left channel and red for the right channel.

Can I use a receiver as an external amplifier?

A receiver is basically an integrated amplifier with lots of other controls for both audio and video that means that you can use a second receiver as an external integrated amplifier. To do this you would need to clear the setting on the second receiver.

This would not be so ideal but is doable.

HDMI CEC- Why is it important?

HDMI CEC

HDMI CEC also known as Consumer Electronics Control, is an HDMI feature that allows a home theater or media room user to control all the devices connected via HDMI using one remote. With HDMI CEC you can command up to 15 devices including your display device, audio devices, Blu-ray player, TV box, gaming console, and so on using one remote.

Gone are the days when you would need a remote for each of your devices. Thanks to the HDMI CEC feature, which has been around for more than 13 years now, things have become much simplified and made flipping between devices that much easier.

However, you may be forced to use a specific remote for a certain device for some of the unique features but HDMI CEC is packed with the core features that you may need for your day to day use.

This feature was 1st introduced with HDMI 1.0 and updated with the release of HDMI 1.3. HDMI CEC has gotten better with the advancement of media technology in more and more devices.

How does HDMI CEC work?

HDMI CEC enables you to use one of your connected device’s remote to control your whole entertainment system.

For example, you can control your Blu-ray player using only the TV’s or projector’s (yes, some projectors are CEC compatible) remote. In this case, the remote communicates between the devices to send a signal through the HDMI cable to the Blu-ray player.

This happens because the CEC signal is a separate electrical signal to other Audio/Video signals that are sent through the HDMI cable. What this means is that you can also turn on or control a device in sleep mode or one that is turned off (HDMI circuitry is disabled) by using the CEC signal.

The CEC signal is identical to the AV signals but is of a higher-level and is more detailed. This signal is carried through a single wire and is sent with fixed timing and also has a special start signal.

But for the devices to work with this feature, they must be able to transmit the CEC signal.

Which features does HDMI CEC support?

HDMI CEC can support some of the core features found on most remote controls that you would need for your system from powering on your devices to the menu selection and even but not limited to the playback selections. With CEC you will no longer need a remote for every device for flipping between the various devices when using your universal remote.

10 core HDMI CEC features;

1.      Power on and off (System Standby)

With HDMI CEC, you do not have to power each of your connected devices on or off individually as you can do this with one button press.

2.      One-Touch Play

Automatically switches to the display device once playback starts on your media devices and removes the hassle of having to navigate through the input source menus.

3.      Device Menu Control

Allows you as a user to control the menu of a different device within the system by passing through the UI commands.

4.      System Audio control

Imposes one audio control for the entire system and eliminates the problem of having to calibrate the volume for each of your devices individually.

5.      Tuner control

Allows you to transfer the tuner of one of your system’s devices to another device.

6.      Deck control

Allows you to control your playback devices’ operations. This includes play, rewind, forward, pause, and so on.

7.      One Touch Record

For recording whatever you are playing on your display device to the selected recording component.

8.      Remote Control Pass through

To pass remote control commands from one device to another in the system.

9.      Routing Control

To control signal sources switching.

10.  System information

Allows you to check the configuration and bus addresses for all devices within the system.

How to set up HDMI CEC

The HDMI CEC settings can vary from one device to another but in most cases, it is found in the system/sound setting on your device’s selection menu.

For all the devices that you plan to connect through HDMI CEC, you will need to configure the setting for each device.

Here is how you can enable HDMI CEC on some of the popular devices;

LG TV Simplink

Simplink is the HDMI CEC brand name for LG devices.

  1. Open the Quick or General settings menu and navigate to the Advanced Setting icon and click.
  2. Find the Simplink Option and open.
  3. Turn on the Simplink option.
  4. Enable Power Sync

Sony TV Bravia Sync

Bravia sync is the HDMI CEC brand name for Sony TVs.

  1. Open the settings menu and navigate to the external inputs option, select it.
  2. Select and activate Bravia Sync.
  3. Select the Device list to adjust the CEC settings for each device that is connected through HDMI.

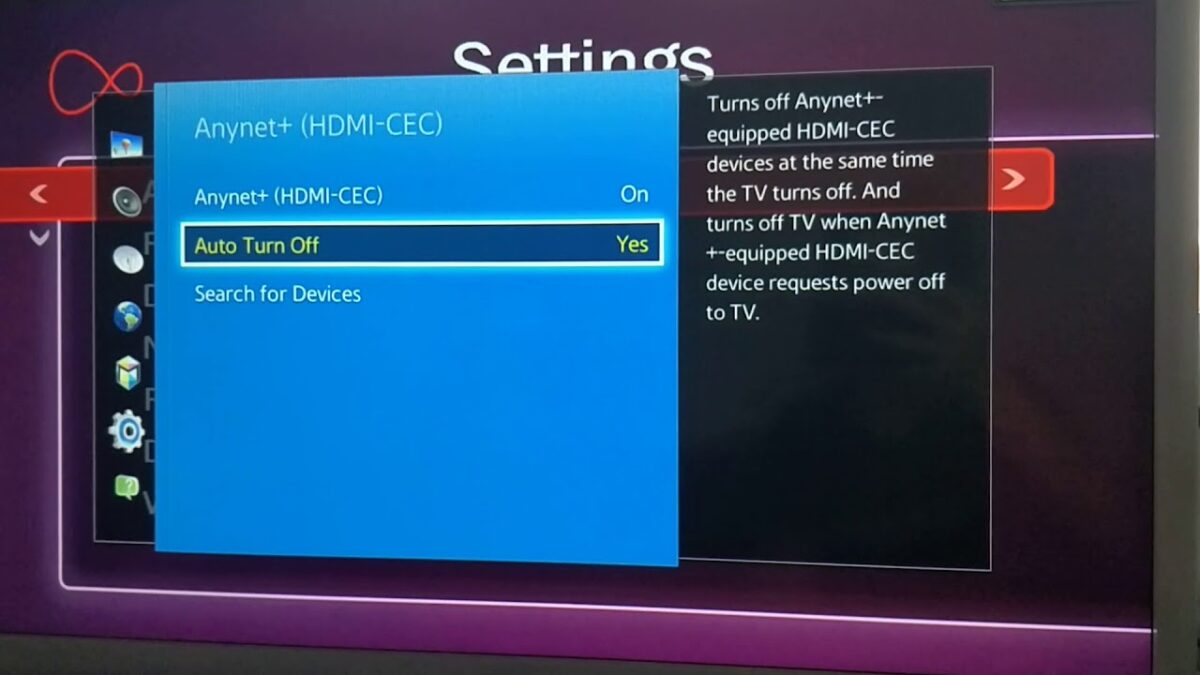
Samsung TV Anynet+

Anynet+ is the brand name for Samsung HDMI CEC.

  1. Select the External Device Manager under General Settings.
  2. Select and activate Anynet+.
  3. Open Universal Remote under the source list and add a new device.

Vizio TV CEC

  1. Select the System under the General menu settings.
  2. Select and enable CEC Function.
  3. Turn System Audio Control on.

Onkyo RIHD

RIHD is the term Onkyo uses to mean HDMU CEC in their devices.

  1. Press Receiver.
  2. Select the Setup option.
  3. Select Hardware and open the HDMI option.
  4. Select and enable HDMI CEC (RIHD)

Epson projector HDMI Link

HDMI Link is the HDMI CEC brand name for Epson devices.

  1. Open the general Menu and open the Settings option.
  2. Select and turn on HDMI Link and Esc.
  3. Navigate to Device connections and enter to select the device you want to control.

You can also adjust the setting for the options you want to control through HDMI CEC.

Panasonic projector HDAVI Control, VIERA Link or EZ-sync

HDAVI Control, VIERA Link, or EZ-sync are the terms used to mean HDMI CEC on Panasonic projectors.

  1. Open the main menu by pressing Menu
  2. Navigate to the Setup option and select.
  3. Select HDMI control and enter.
  4. Select the CEC option and turn it on.
  5. Select Power off-link and choose Yes.

Roku 1-Touch Play

The HDMI CEC is some of the Roku players is known as 1-Touch Play.

  1. Select the System under the settings menu.
  2. Select and open Control other devices.
  3. Navigate to 1-Touch play and check the box.

Pioneer Kuro Link

Kuro Link is the brand name used on some of the pioneer devices to mean HDMI CEC.

  1. Select the Receiver option and open the menu.
  2. Select and open System Setup.
  3. Select and open Other Setup.
  4. Select and turn the Kuro Link option on.
  5. Press home to leave.

PlayStation 4 HDMI Device Link

HDMI Device is the term used to mean HDMI CEC for PS4s.

  1. Open the general settings menu.
  2. Select system
  3. Select and enable HDMI Device Link

HDMI CEC brand names

Anthem CEC control
Vizio CEC
Denon HDMI control or CEC
Toshiba CE-Link or Regza Link
Funai/Phillips/Emerson/Magnavox/Sylvania Fun-Link
Sony Bravia Link or Bravia Sync
Sharp Aquos Link
Hitachi HDMI-CEC
LG Simplink
Samsung Anynet or Anynet+
Pioneer Kuro Link
Philips EasyLink
Panasonic Viera Link, HDAVI Control, EZ-Sync
Onkyo RIHD
Mitsubishi NetCommand

The pros and cons of using HDMI CEC

HDMI CEC pros

  • Seamless integration and control of HDMI devices in your home theater system.
  • Can work in combination with HDMI ARC to reduce the number of cables that you need in your setup for a cleaner look.

HDMI CEC cons

  • Limits the ability of the HDMI ARC to deliver a full high-quality surround sound and limits you to a compressed 5.1 surround or uncompressed stereo audio set up.
  • Different manufacturers use different names to mean HDMI CEC which can be a bit confusing at first.

HDMI CEC tips

For some soundbars, you may need to turn HDMI ARC and CEC (check brand name online) to use this feature. However, in some cases, you may need to download an app to enable this feature and follow the instructions for that particular soundbar.

To use HDMI CEC on your Windows PC, your hardware including your graphics card and drivers must support the CEC feature. However, not many computers are capable of this. For some Windows computers that do not have the CEC feature support, you can use various products that can add support. These products can then be connected to your PC and display device via a USB-CEC adapter to send the CEC commands. However, you should keep in mind that not may Windows computers will support this feature.

If you are using a universal remote, HDMI CEC commands may sometimes conflict with the universal remote. To use your universal remote, you will need to turn off CEC from all your devices.

My final thoughts

Using HDMI CEC may not be perfect for smooth remote operation in your system as not all devices may have support for this feature. You can always use other universal remote-control options to streamline all the operations for all your components.

However, if most or all of the devices support HDMI CEC, you can always try it out and see how well it works for you.